How your plan and billing works
Each plan in MailerSend (including the free plan) includes a monthly email limit. Once you have reached your plan’s email allowance for the month, you’ll simply be charged—in the next month—a set rate for every additional 1000 emails sent. So you can rest assured your important transactional emails will continue to be sent even if your plan’s quota is exceeded. The number of emails that you send then resets every 30 days.
What’s included in the free plan
The free plan allows you to send up to 3,000 emails every month for free (yes, for free)! If your outgoing emails exceed 3,000 within your billing period, you can continue to send emails at a metered rate of $1.00 per 1000 additional emails sent.
In addition, the free plan grants you unlimited access to features such as: Email API, SMTP relay, webhooks, advanced email tracking, real-time analytics, multiple email editors and more! Check out our pricing page to discover everything our free plan has to offer.
What’s included in a starter plan
If you need to send more than 3,000 emails a month, you will benefit from subscribing to a starter plan. You can select your plan size based on the number of emails you expect you’ll need to send. If you exceed the sending quota outlined in your starter plan, you will be charged a metered rate of starting at $0.90 per additional 1000 emails sent.
On top of larger sending limits and discounted pay-as-you-go rates, starter plans, of course, include starter features! This includes:
Transactional SMS API
7-day log retention
Inbound routing
Multiple sending domains
Dedicated IP for high-volume senders
24/7 live chat support
Expert deliverability consultation
Starter plans start from as little as $35.00 a month for an allowance of 50,000 emails per month. Compare MailerSend plans to determine which plan is right for you.
The difference between plan limits
Find the following limits applied to each plan:
Feature | Free plan | Starter plan | Enterprise plan |
|---|---|---|---|
Sending domains | 1 | 10 | Unlimited |
API tokens | 3 | 100 | Unlimited |
Daily API requests | 1,000 | 100,000 | 500,000 |
Webhooks | 1 | 50 | Unlimited |
Inbound routes | 0 | 50 and 5/domain | Unlimited |
SMTP users | 1 | 250 and 5/domain | Unlimited |
Templates | 3 | 250 | Unlimited |
Sender Identities | 0 | 50 | Unlimited |
File folders | 50 | 100 | Unlimited |
Files | 100 | 250 | Unlimited |
User seats | 1 | 5 | Unlimited |
Email verification lists | Unlimited | Unlimited | Unlimited |
Activity retention | 7 days | 7 days | 30 days |
How to upgrade to a plan
Once your account is verified, you can upgrade your account to a free or Starter plan by following these steps:
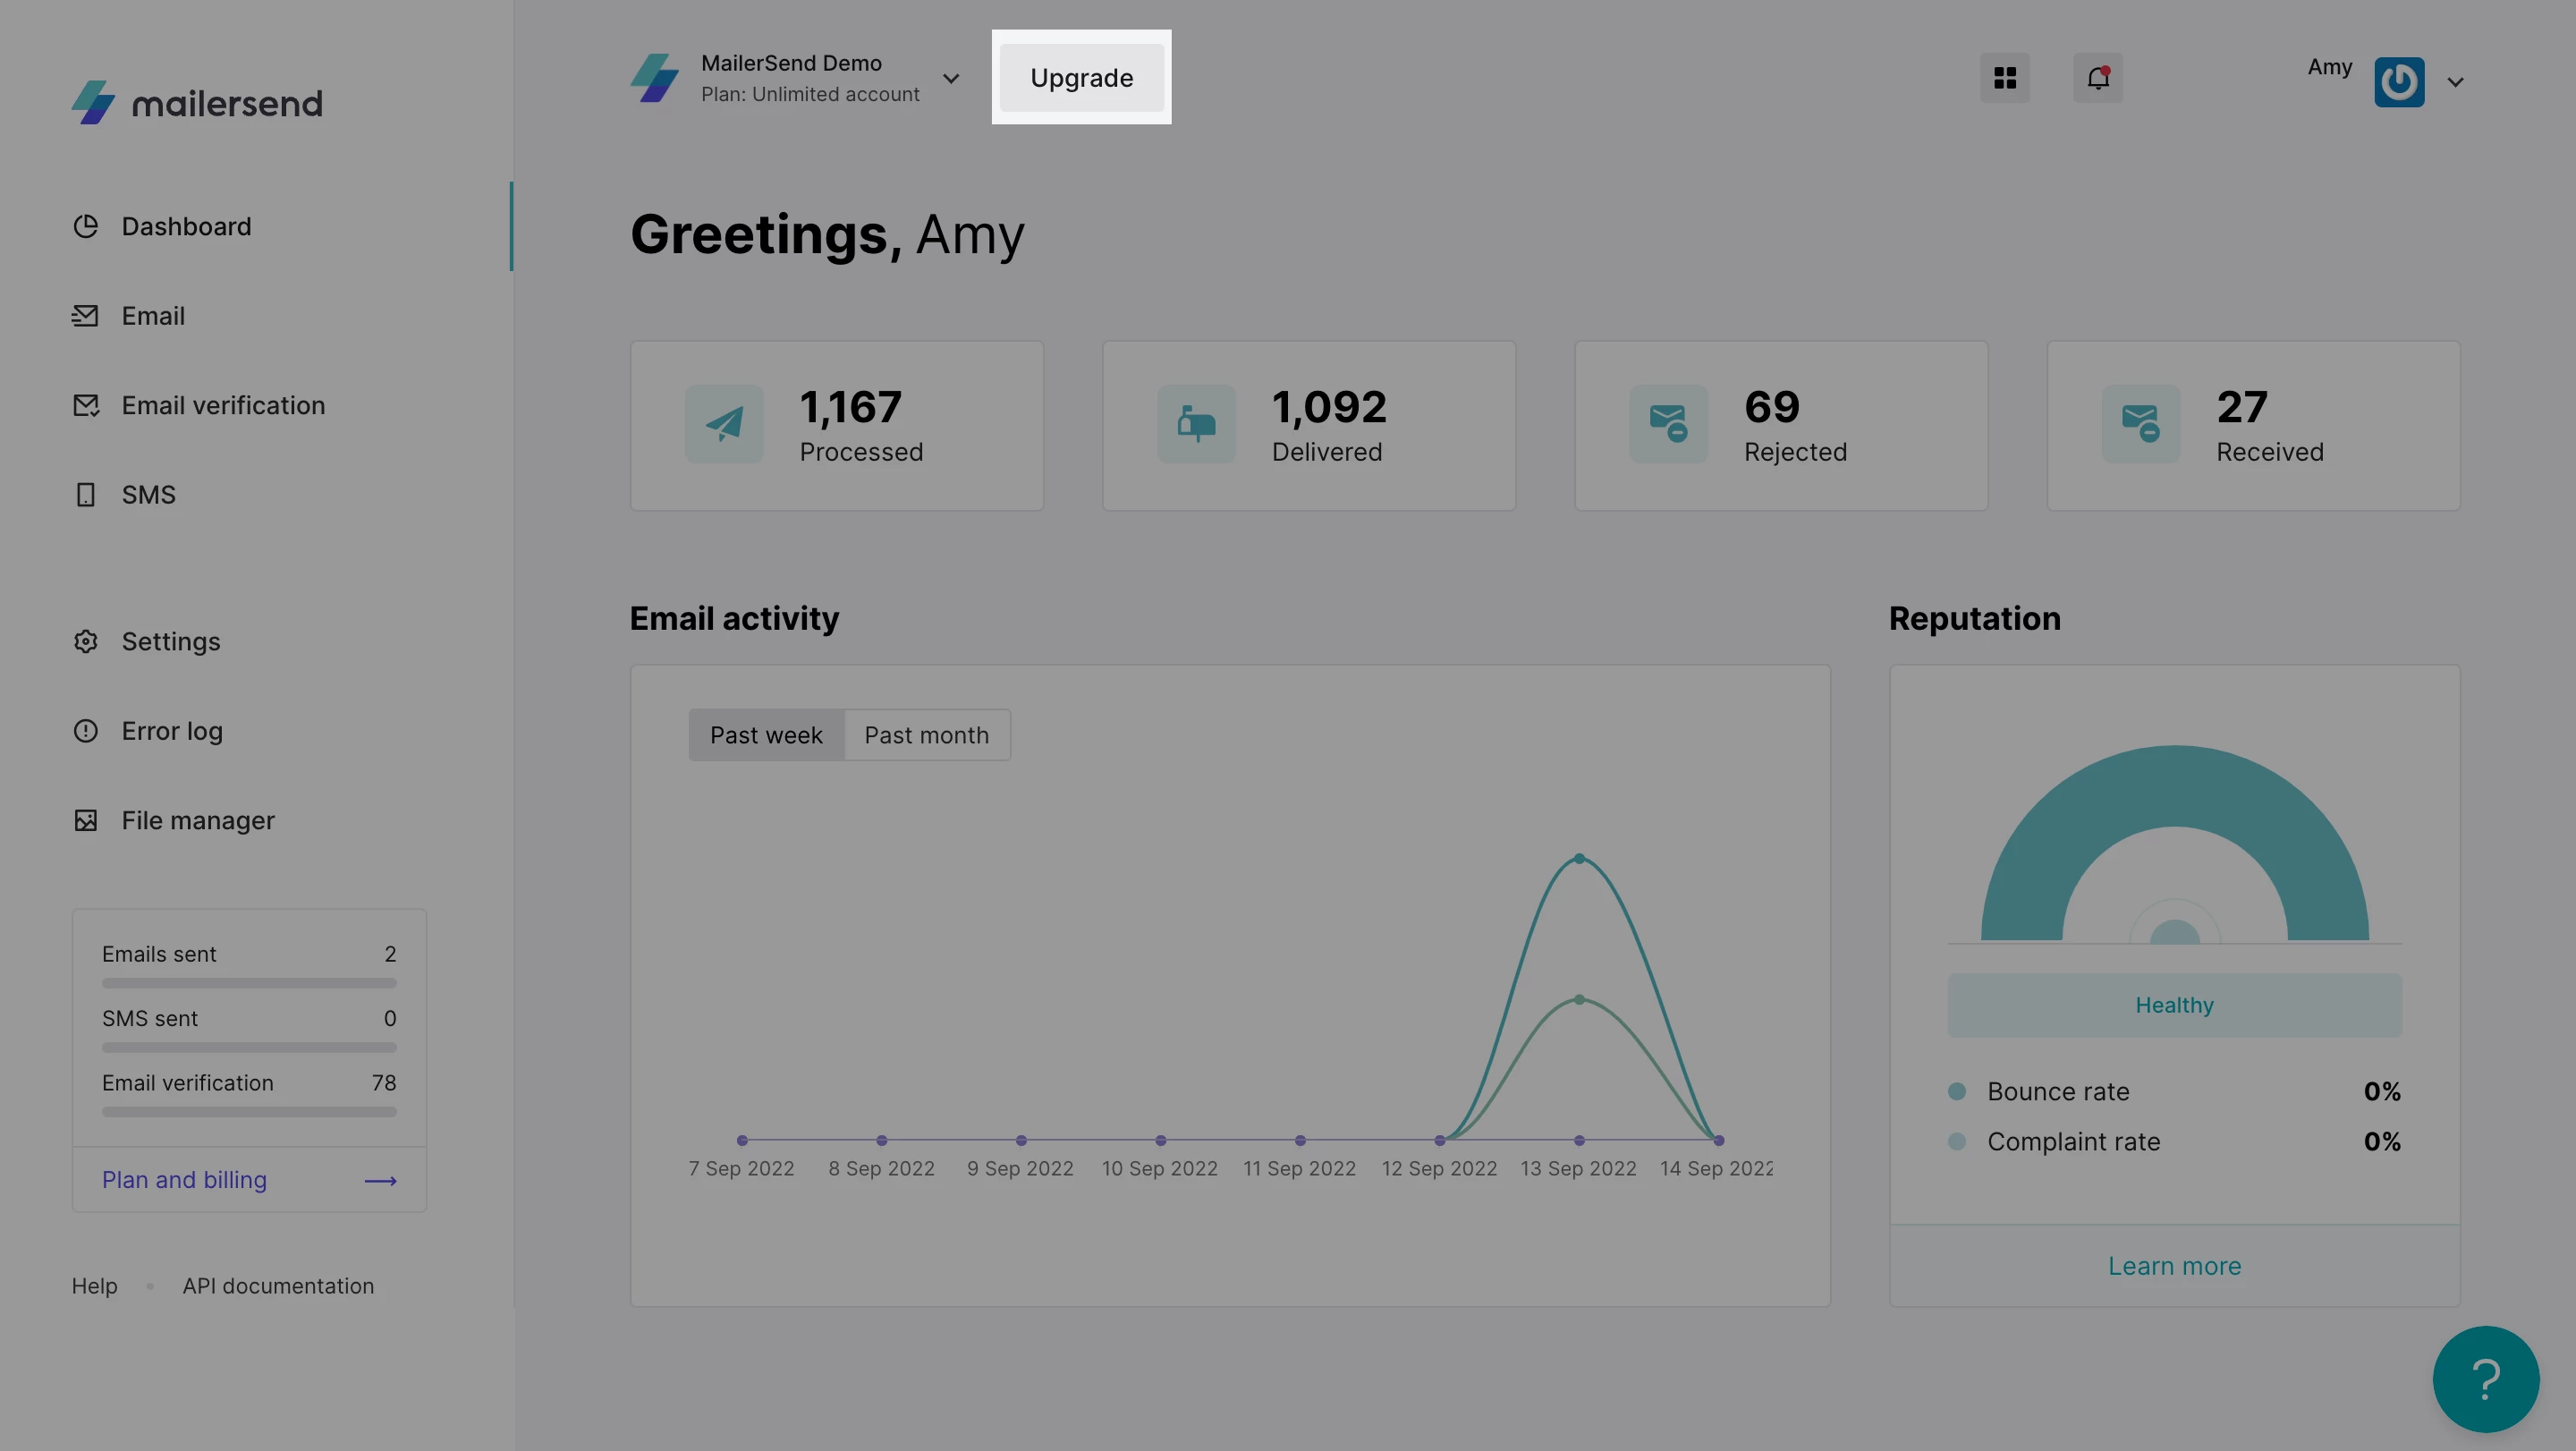
1. From the dashboard, click the Upgrade button next to the top left account menu to navigate to the Plan and billing page.
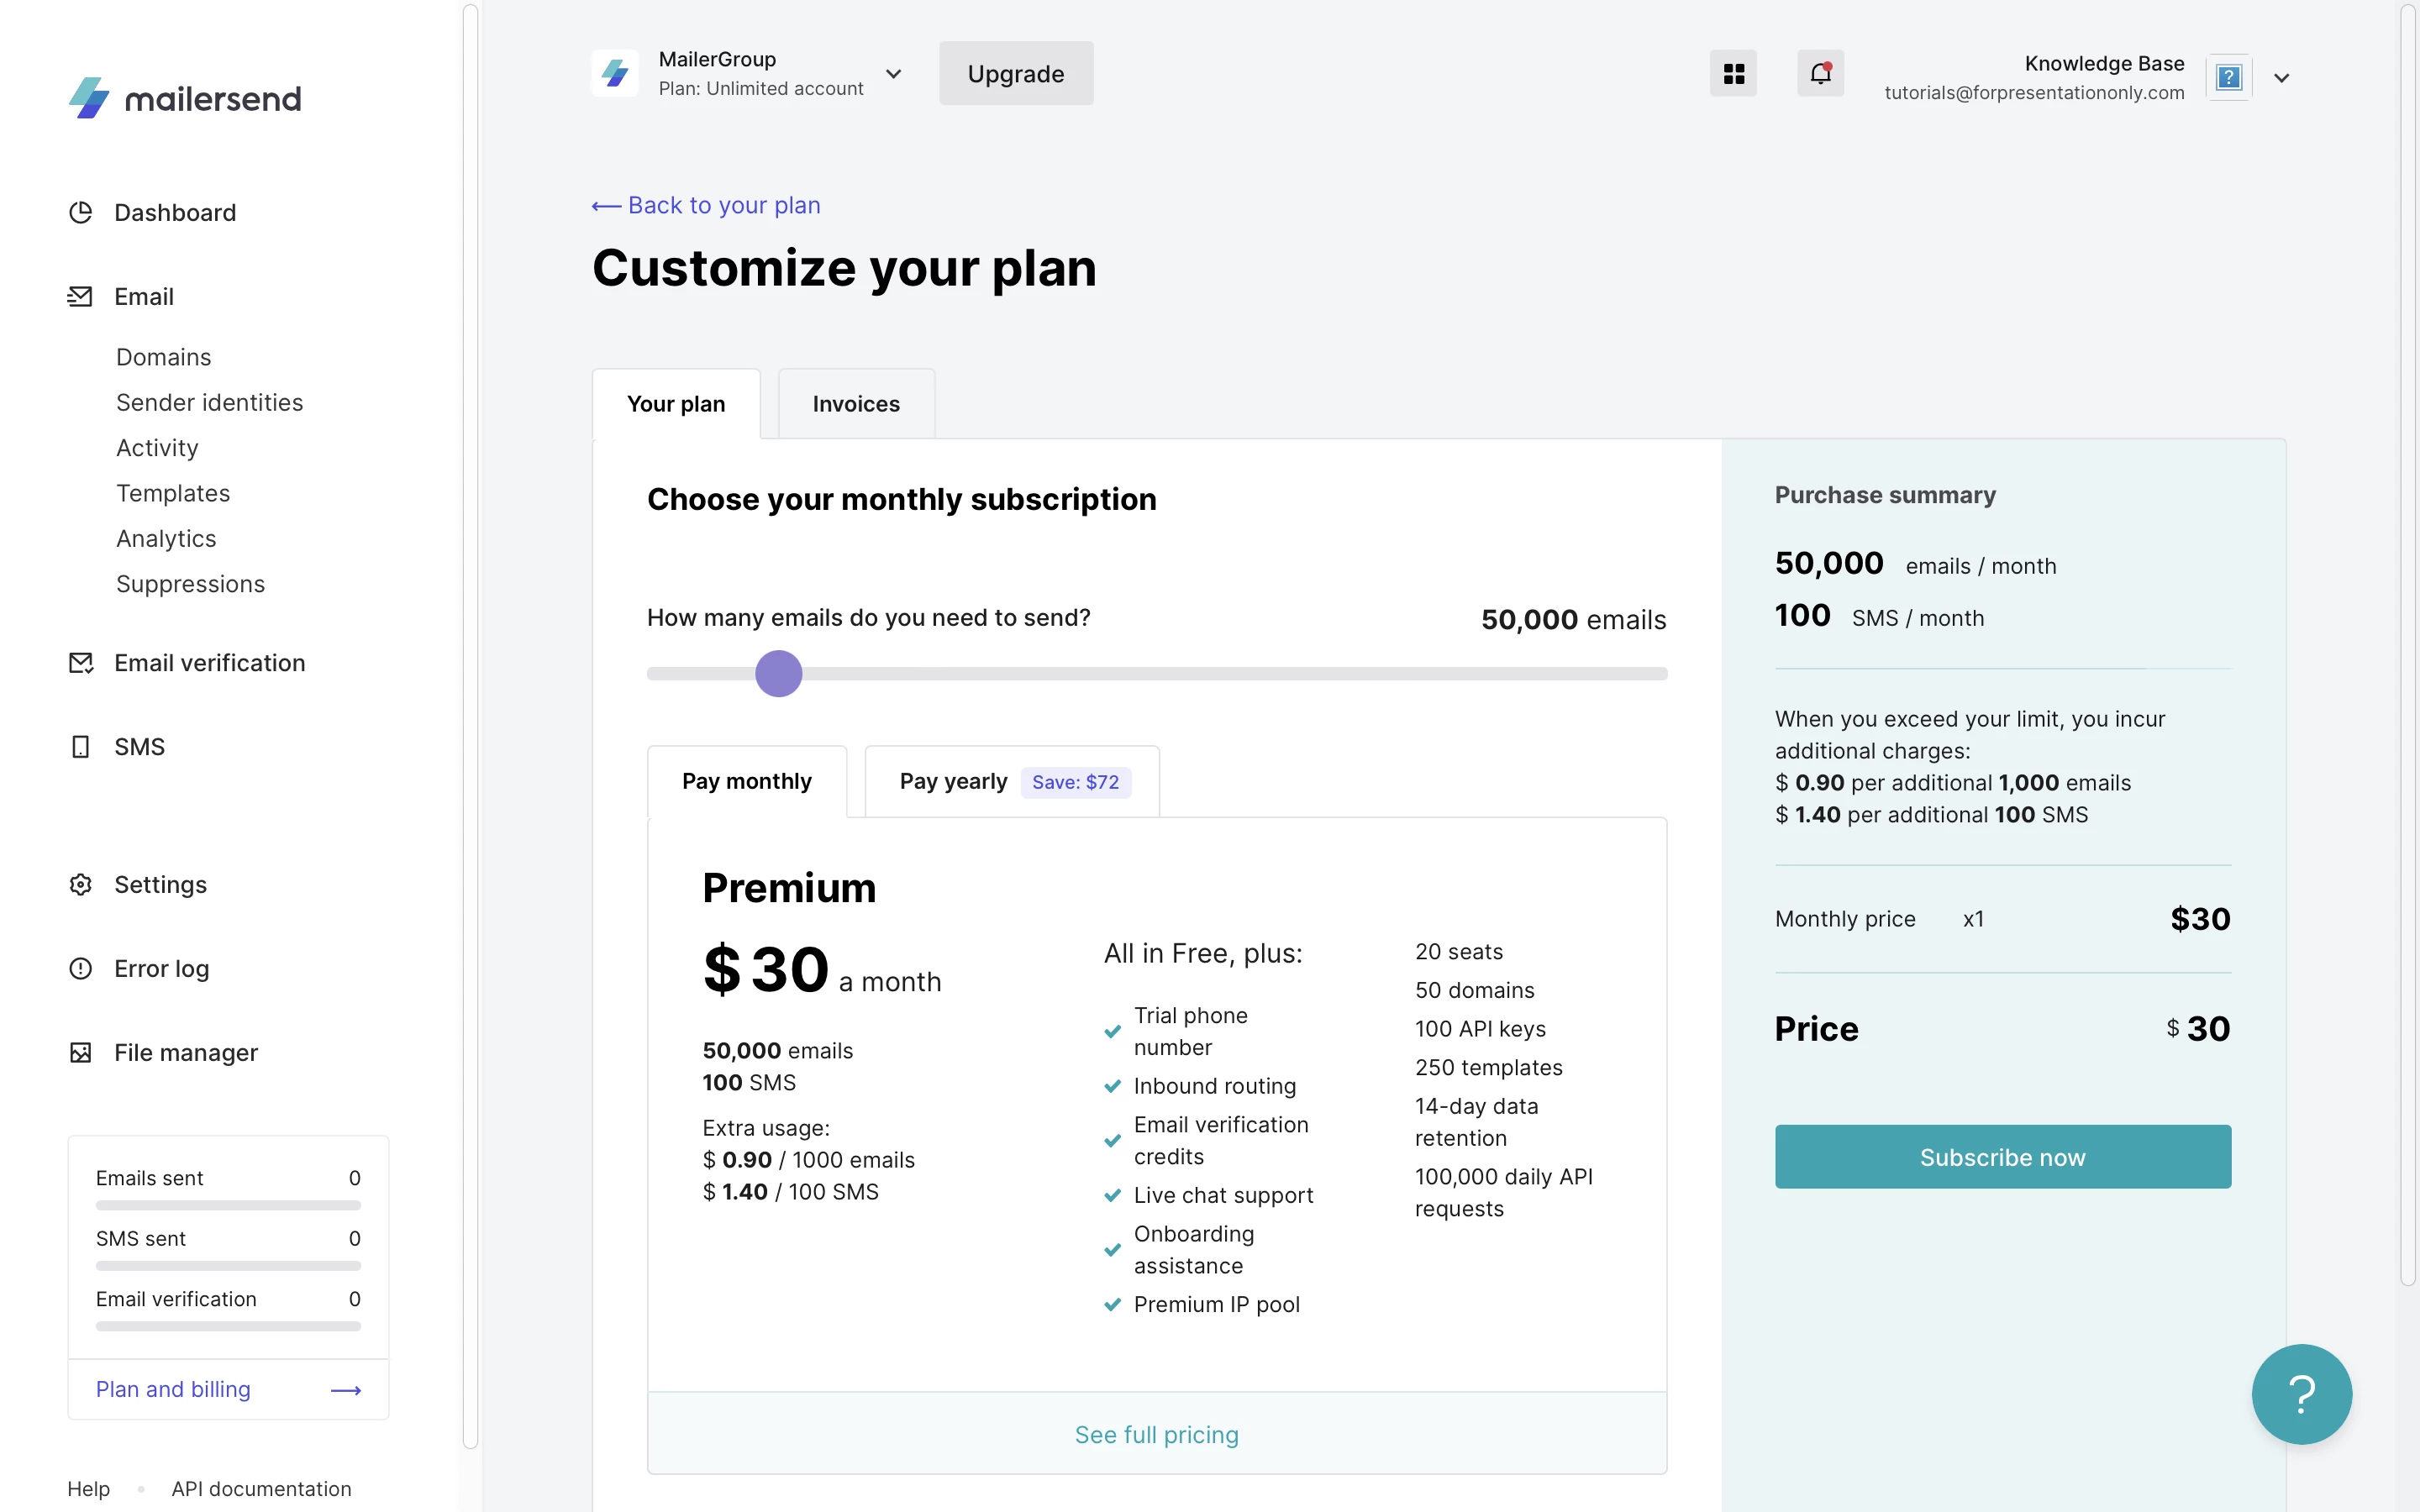
2. Use the slider to select your subscription based on how many emails you need to send. To select the free plan, drag the slider all the way to the left.
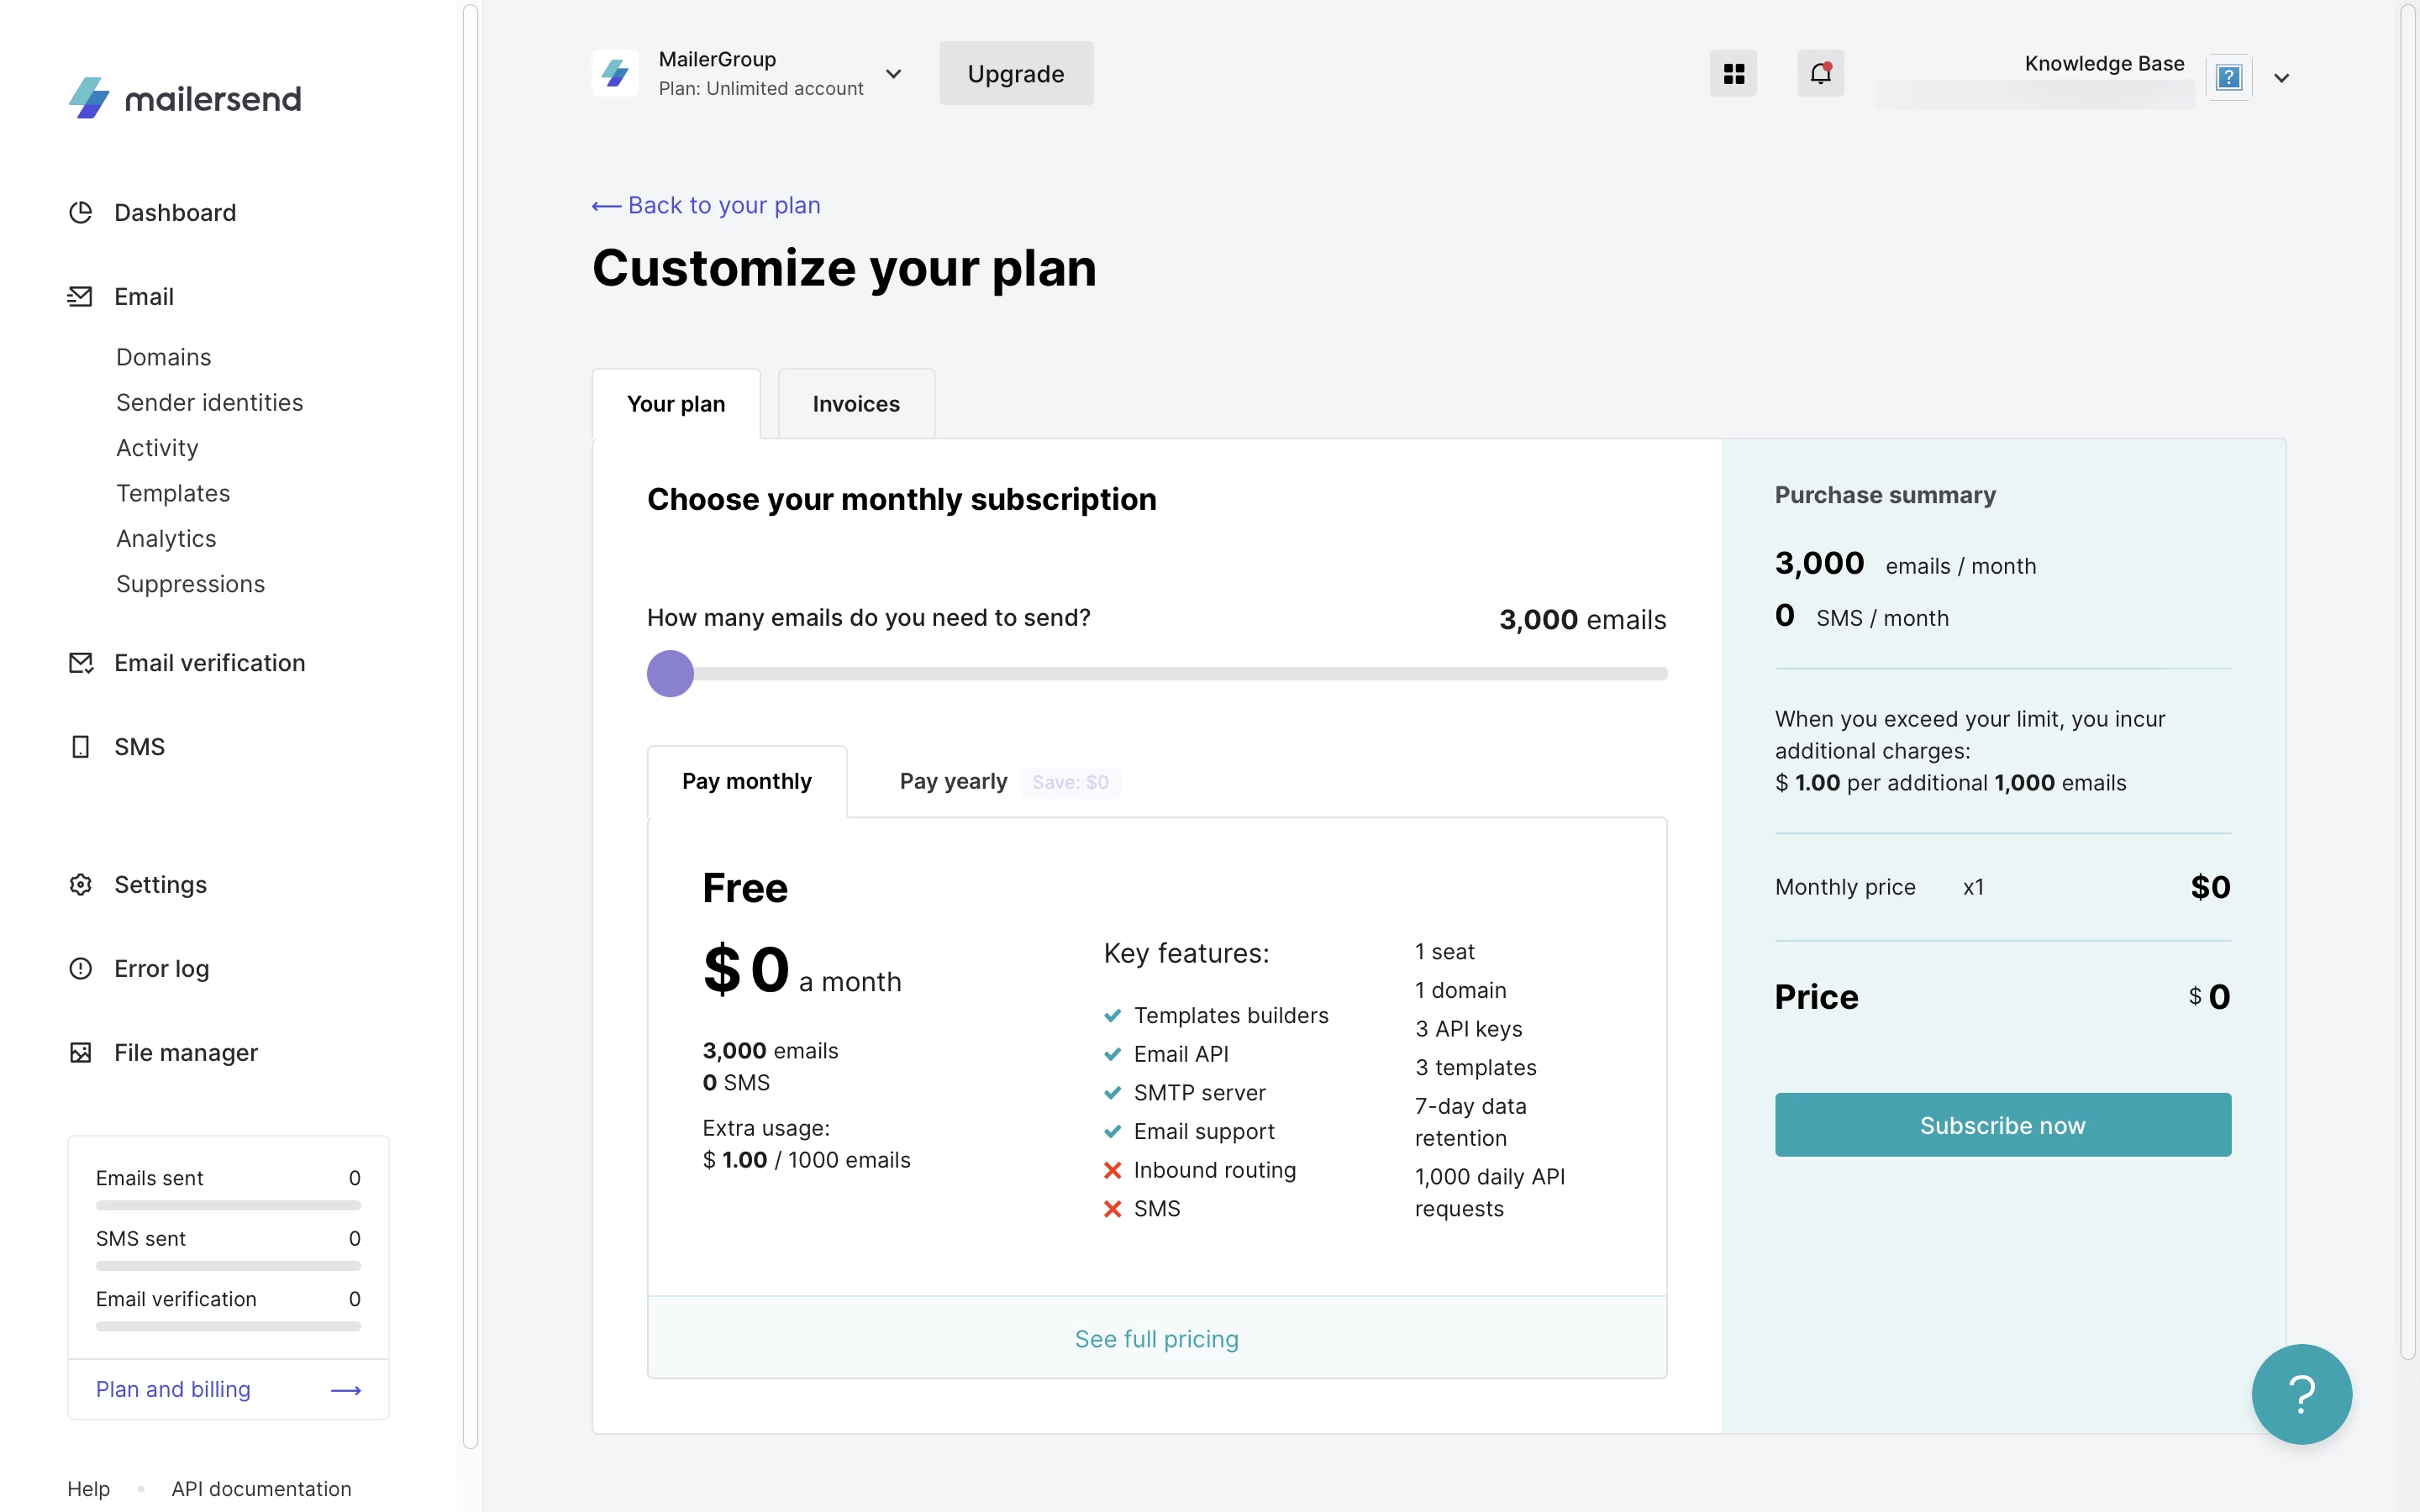
3. Once you’re happy with the plan you have chosen, click Subscribe now.
4. The next step is to enter your billing details and add a payment method.
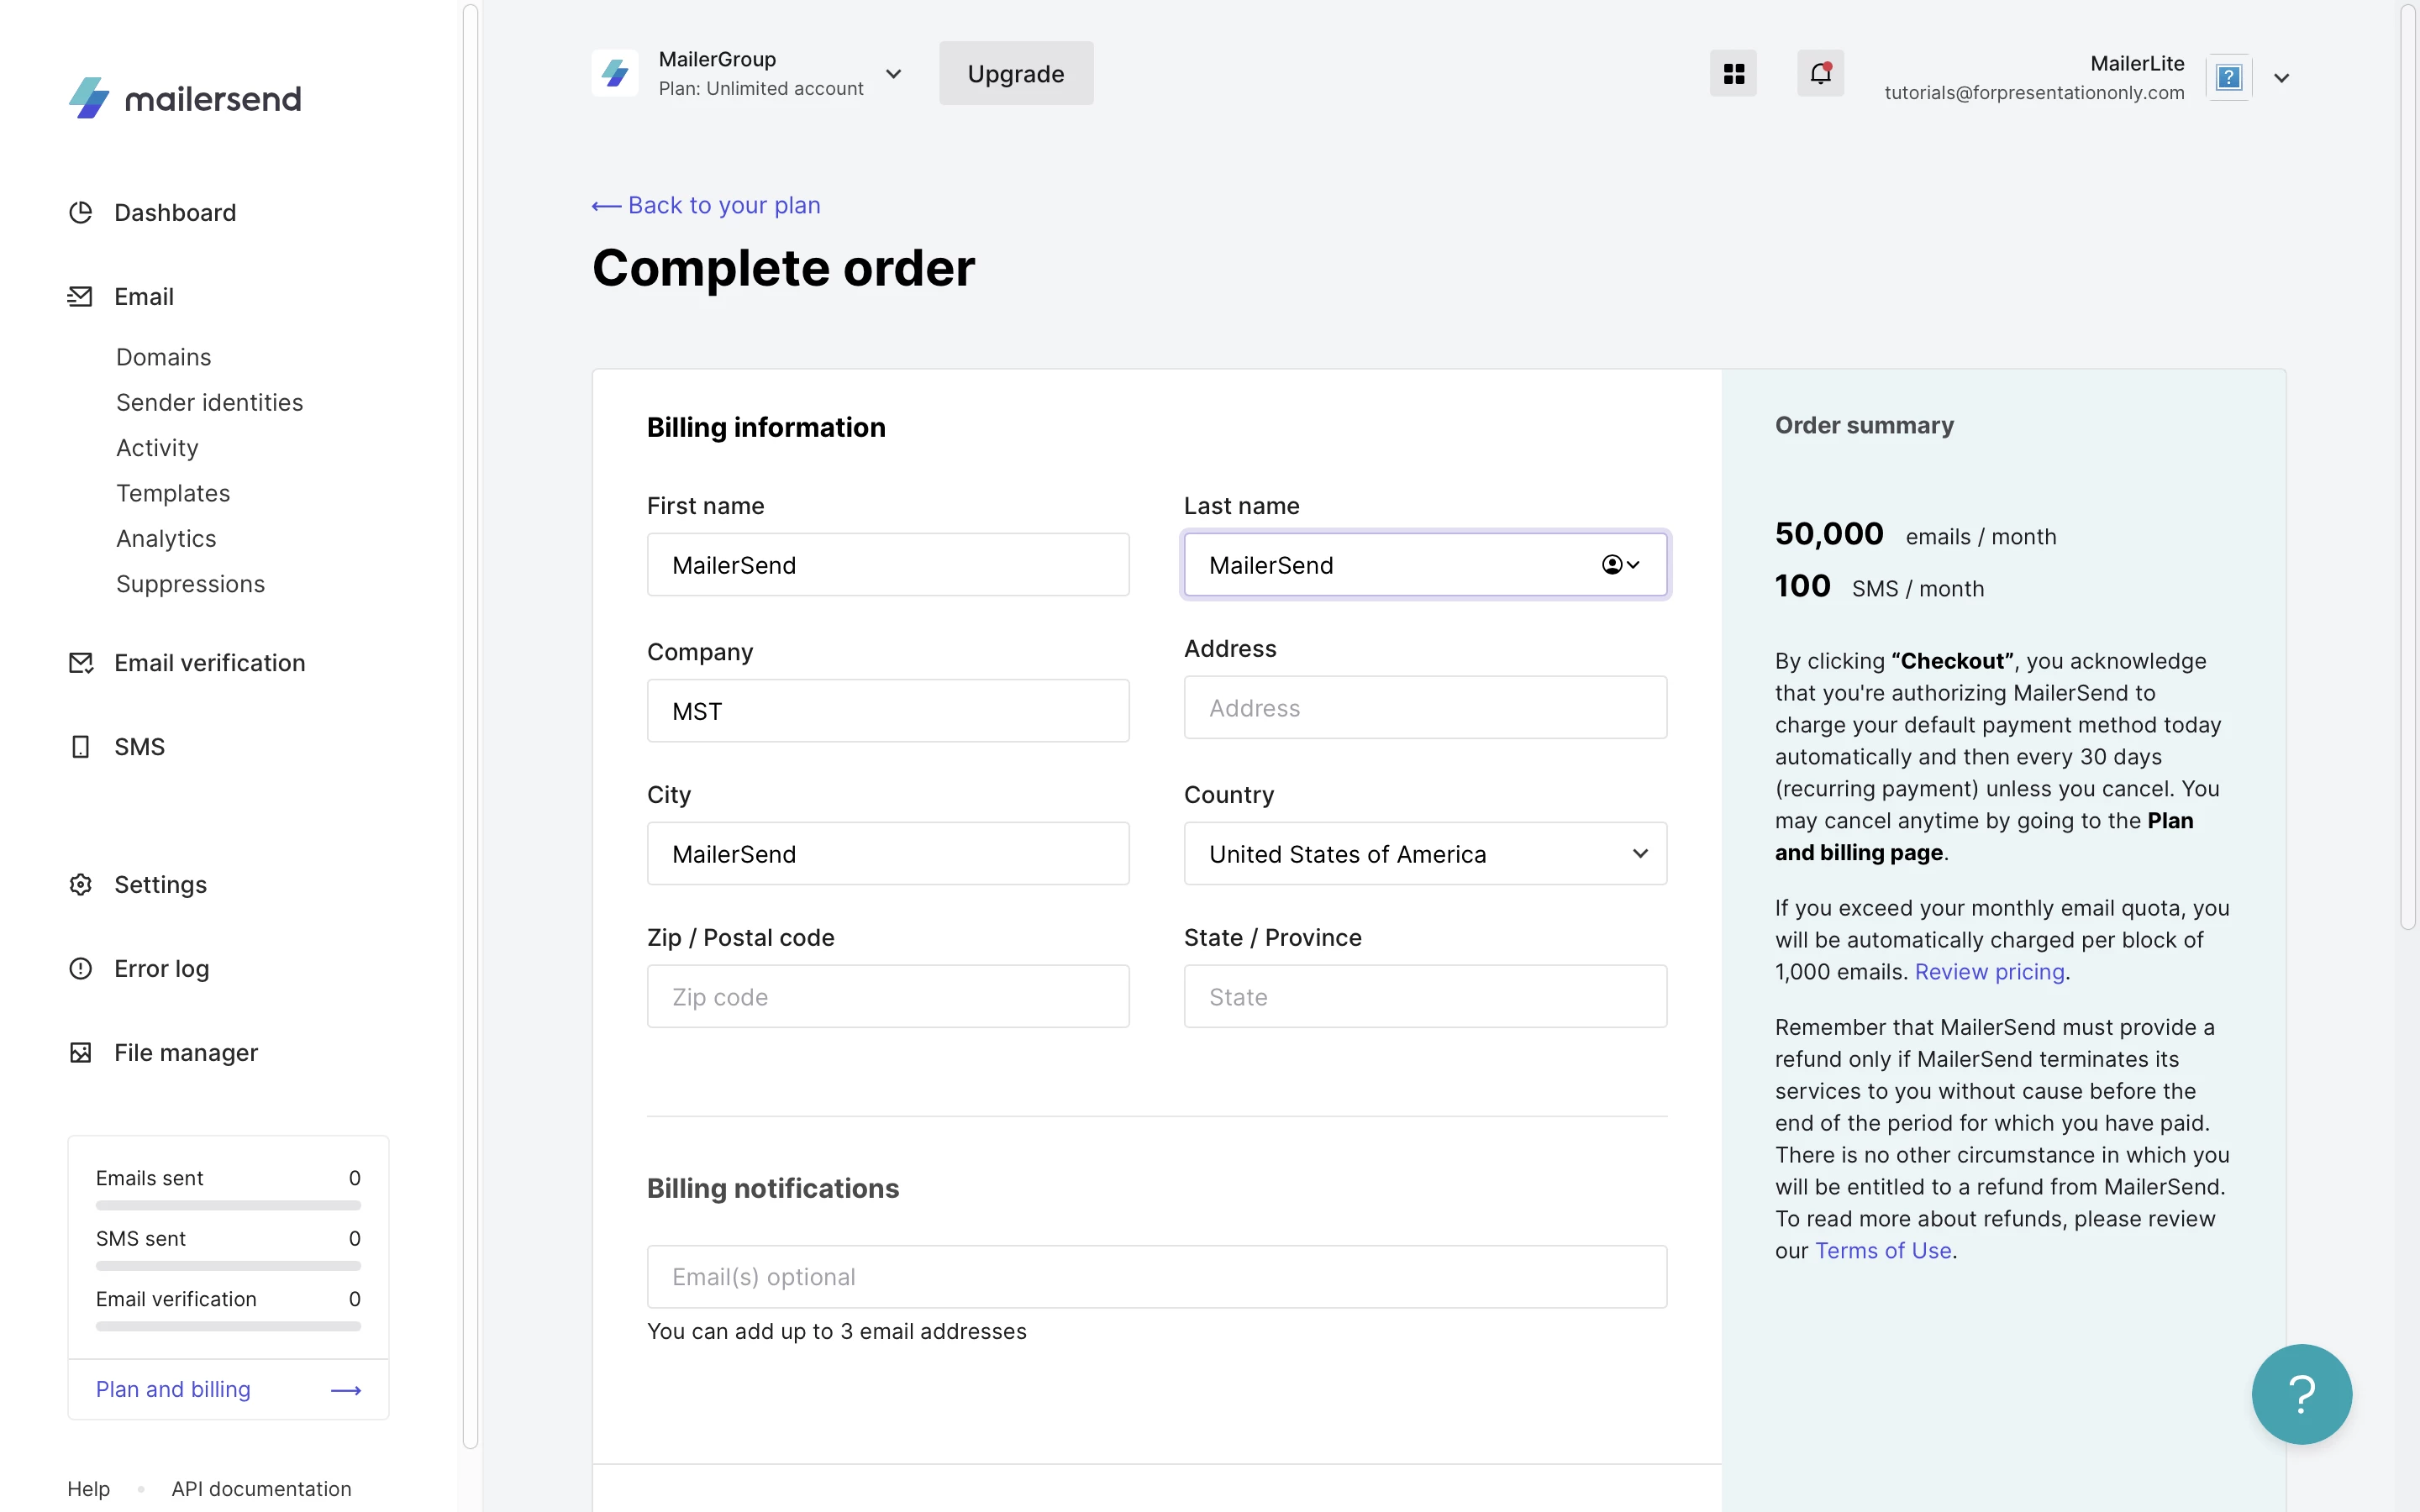
You will need to add a payment method even if you are subscribing to the free plan. This is to ensure you can pay-as-you-go without interruption if you exceed 3,000 emails in a 30 day period.
6. When this is complete, click Checkout to finalize your plan subscription.
That’s it! Your plan is now active and ready to use. Your monthly email quota will reset on your next billing day.
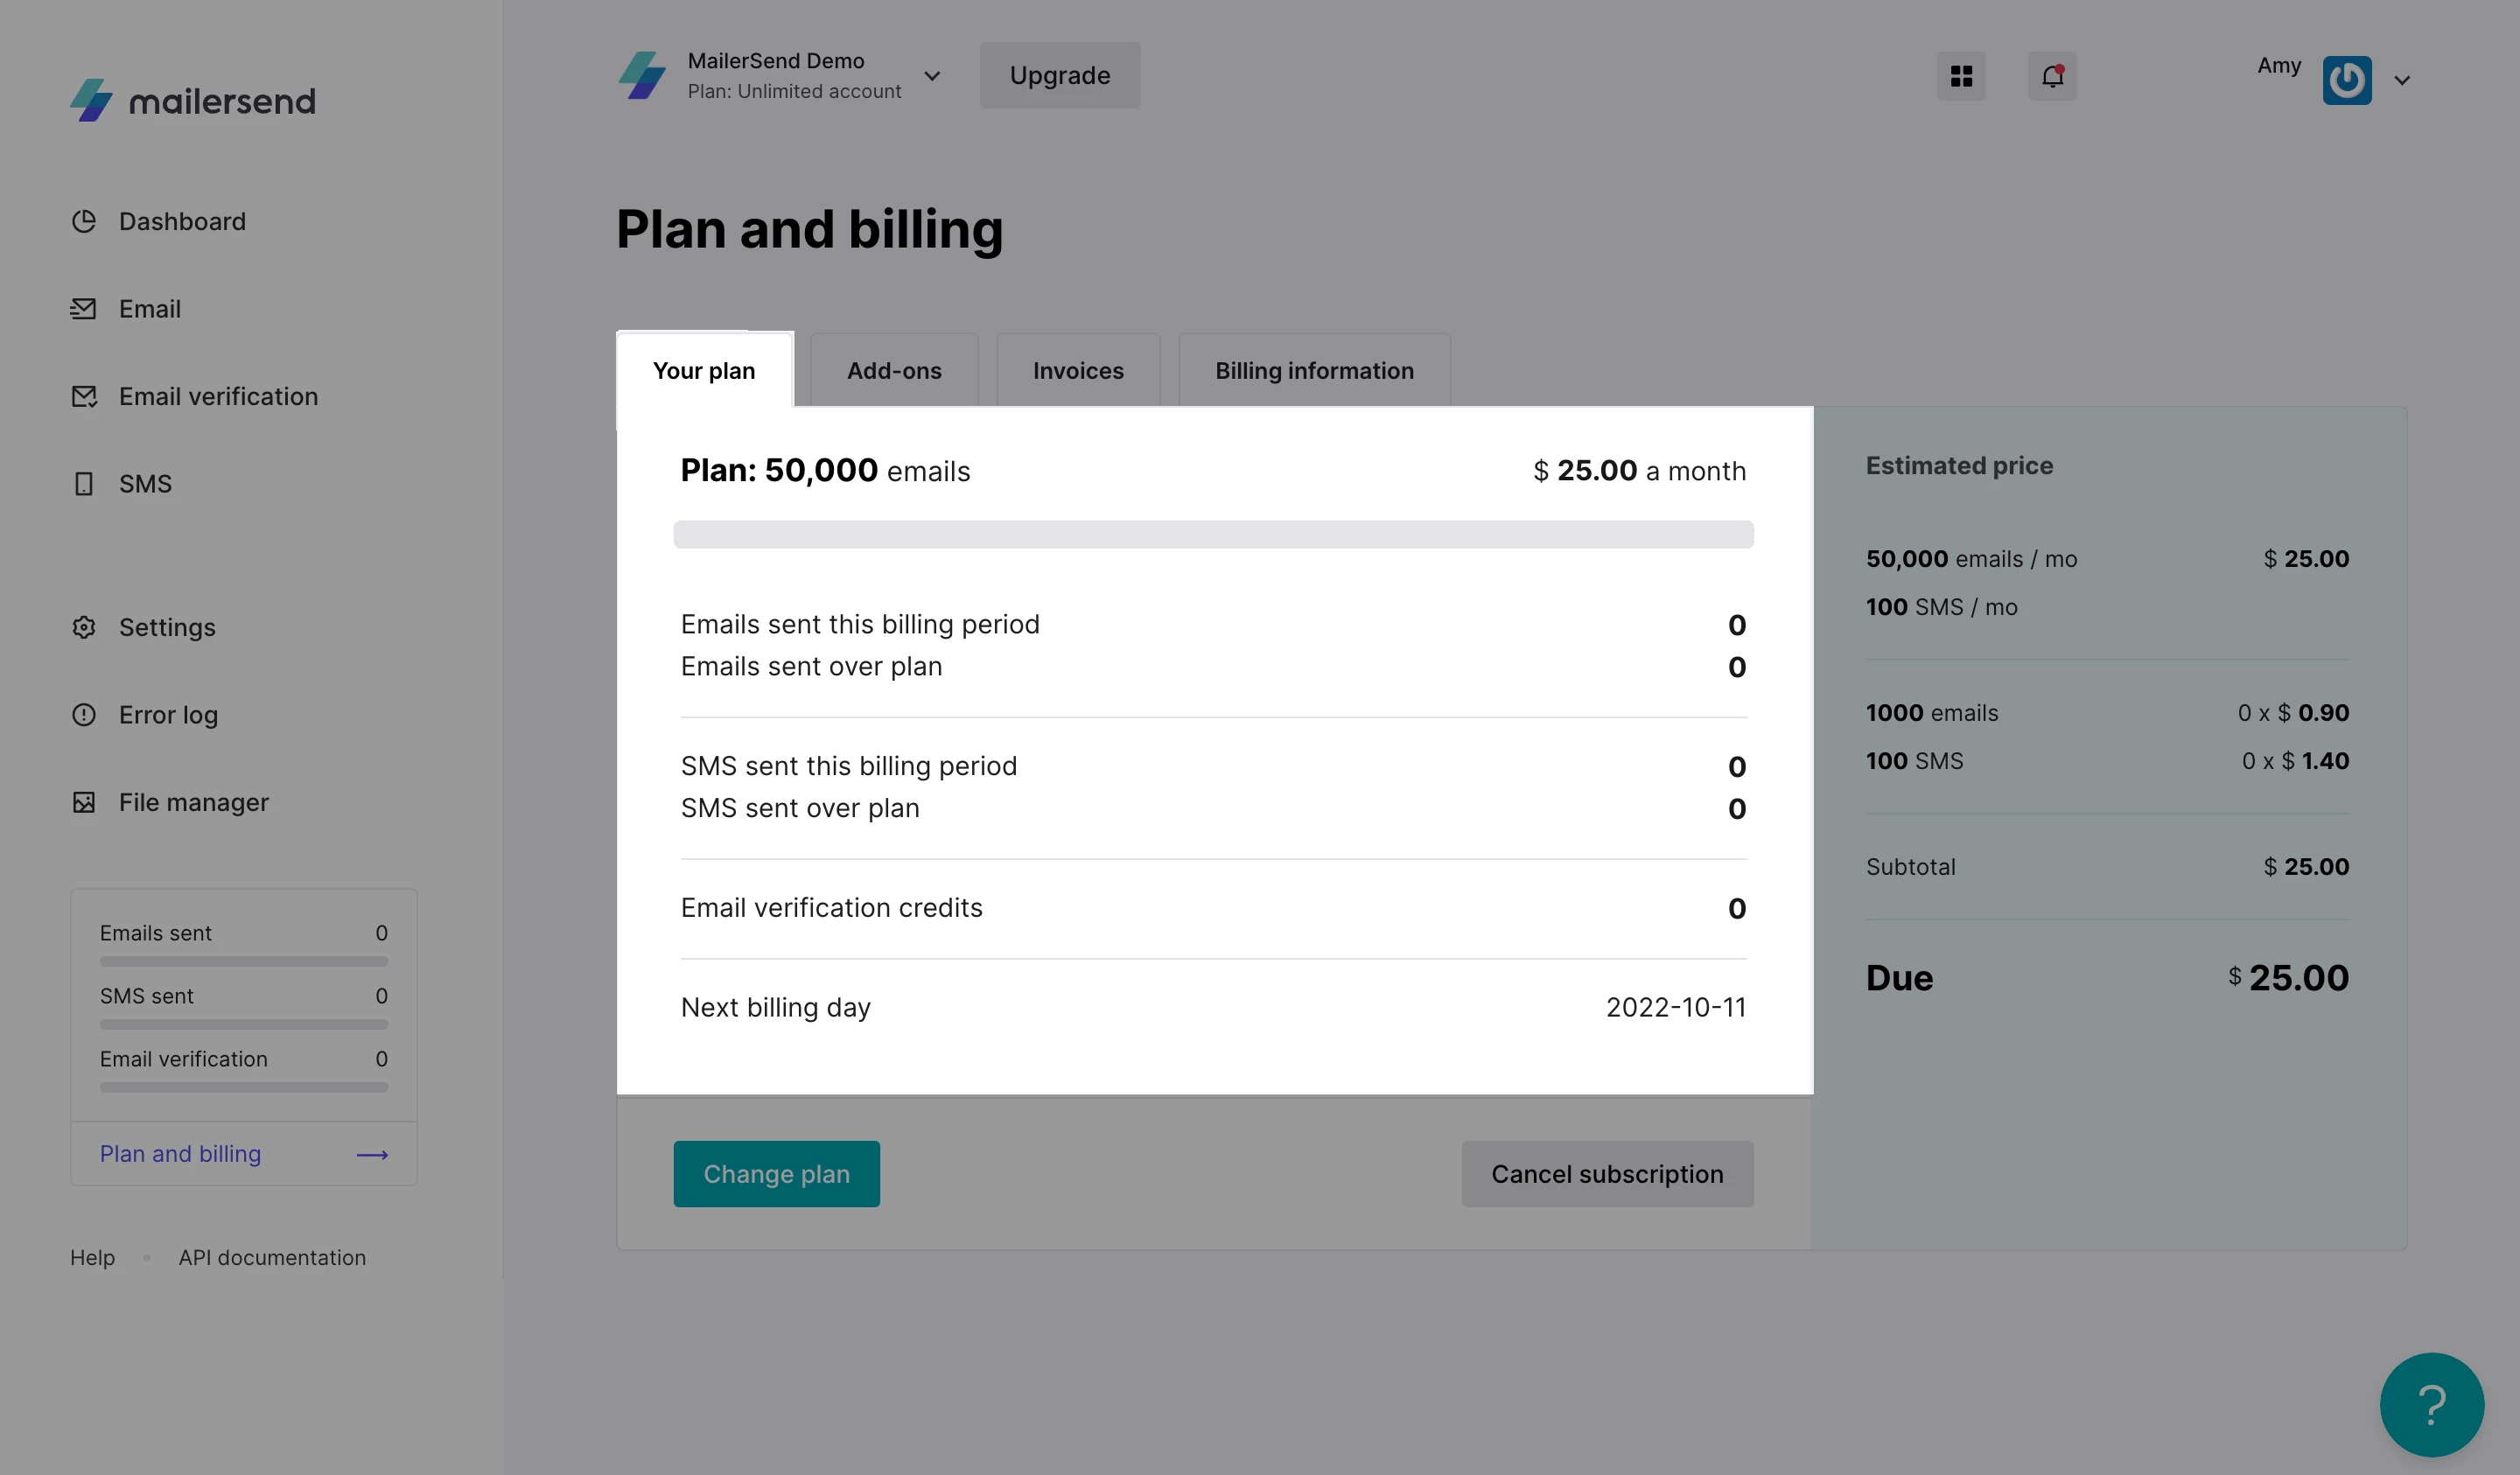
On your Plan and billing page in the Your plan tab, you can now find all the information pertaining to your plan including:
The number of emails and SMS that you have sent during the current month
The number of emails and SMS that you have sent over your plan’s quota during the current month
The number of email verification credits you have
Your next billing day
If you upgrade before your current plan has expired, the time remaining on your current plan will be automatically deducted from the cost of your upgrade.
How to change your plan
If you need to upgrade or downgrade your MailerSend plan:
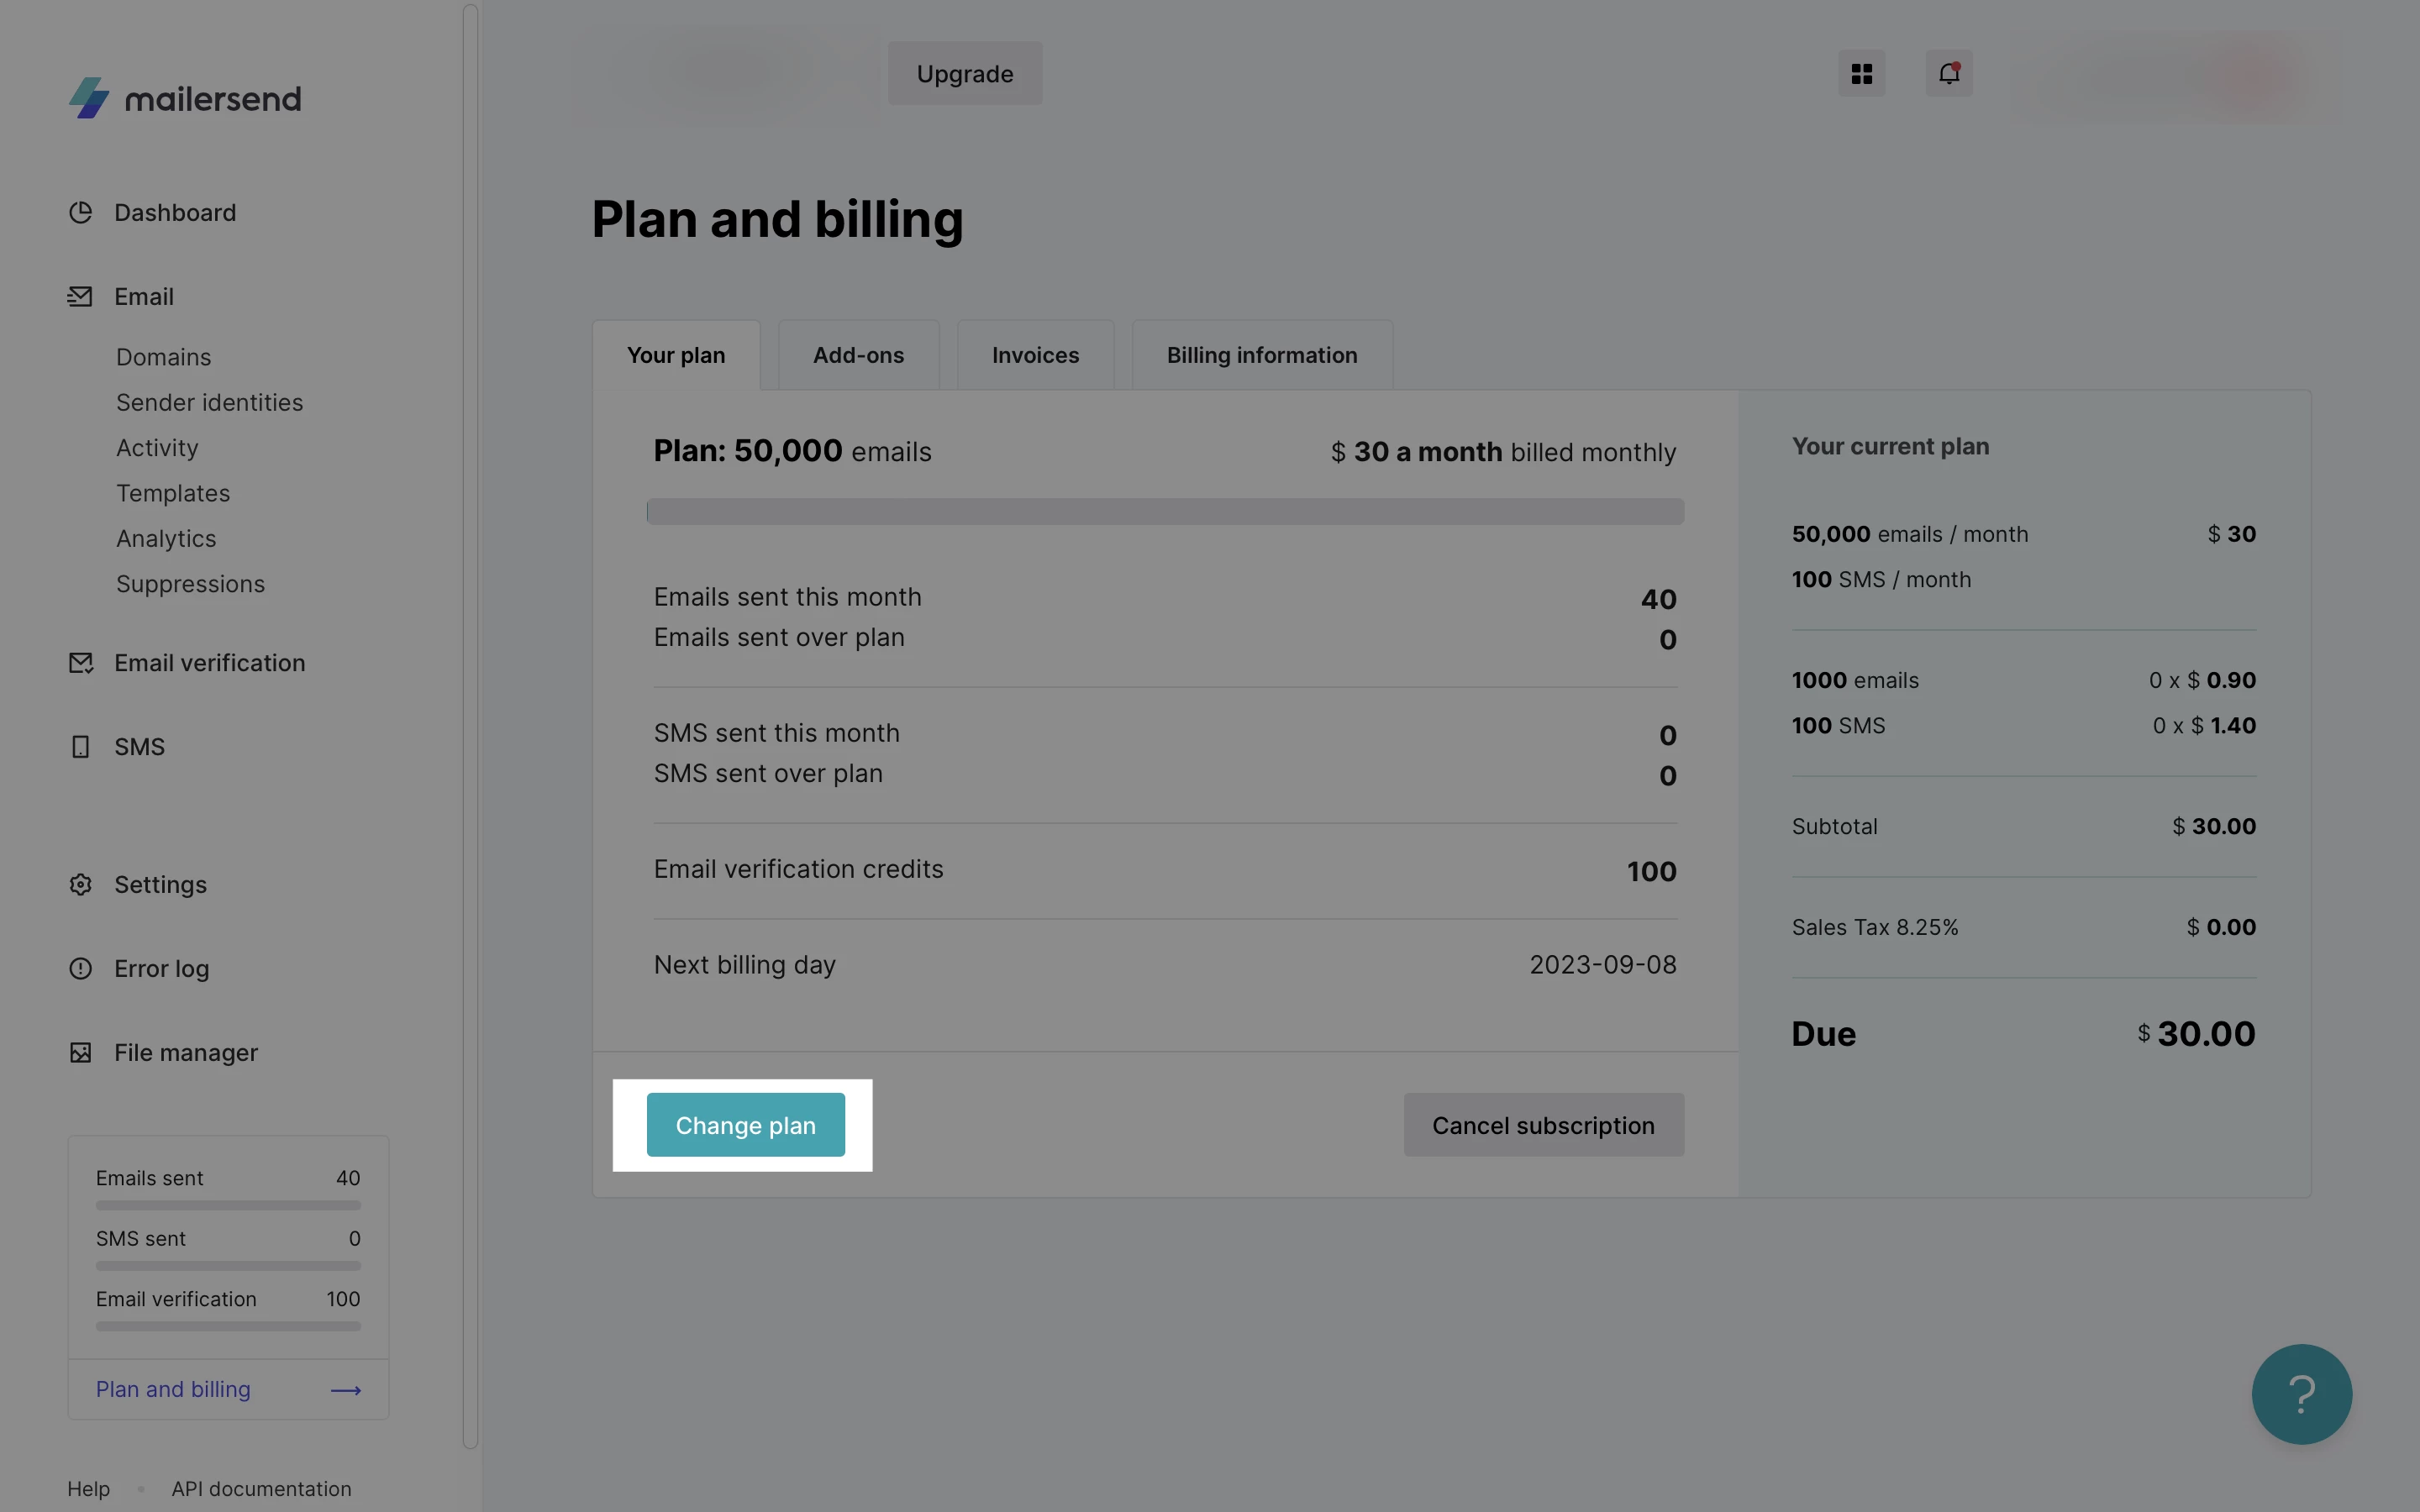
1. Navigate to the Plan and billing page.
2. Click the Change plan button.
3. Use the slider to select your new plan.
In order to successfully downgrade to the Free plan, you will need to delete all resources that are not within the free plan.This includes extra domains, users, and templates. If these assets are not deleted by the end of the grace period (when the new billing period is started), sending will be paused.
Moving from a monthly to yearly subscription
To switch to a yearly plan:
Navigate to the Plan and billing page.
Click the Change plan button.
Choose the Pay yearly tab. The total price for a yearly plan will be displayed at checkout.

Click Upgrade to activate the new plan.
Yearly plans are billed upon subscription and the subscription stays active until the end of the billing period. Keep in mind, any overcharges will be billed at the end of each month.
To delete a domain:
Navigate to the Domains tab.
Select the domain that needs to be removed and click Manage.
Scroll down and click Delete domain.
To remove extra account users:
Navigate to the Settings page.
Choose the Users tab.
Next to Manage, click the arrow and choose Delete to remove the selected user.
To delete a template:
Navigate to the Templates page.
Next to Manage, click the arrow and choose Delete to remove the selected template.
How to cancel your plan
If you no longer require the use of your MailerSend plan, you can cancel your subscription in 3 simple steps.
If you’re not happy with your plan, be sure to reach out support@mailersend.com with any feedback you might have. We’re always looking for ways to improve our product.
1. Navigate to the Plan and billing page.
2. Click the Your plan tab.
3. Click the Cancel subscription button.
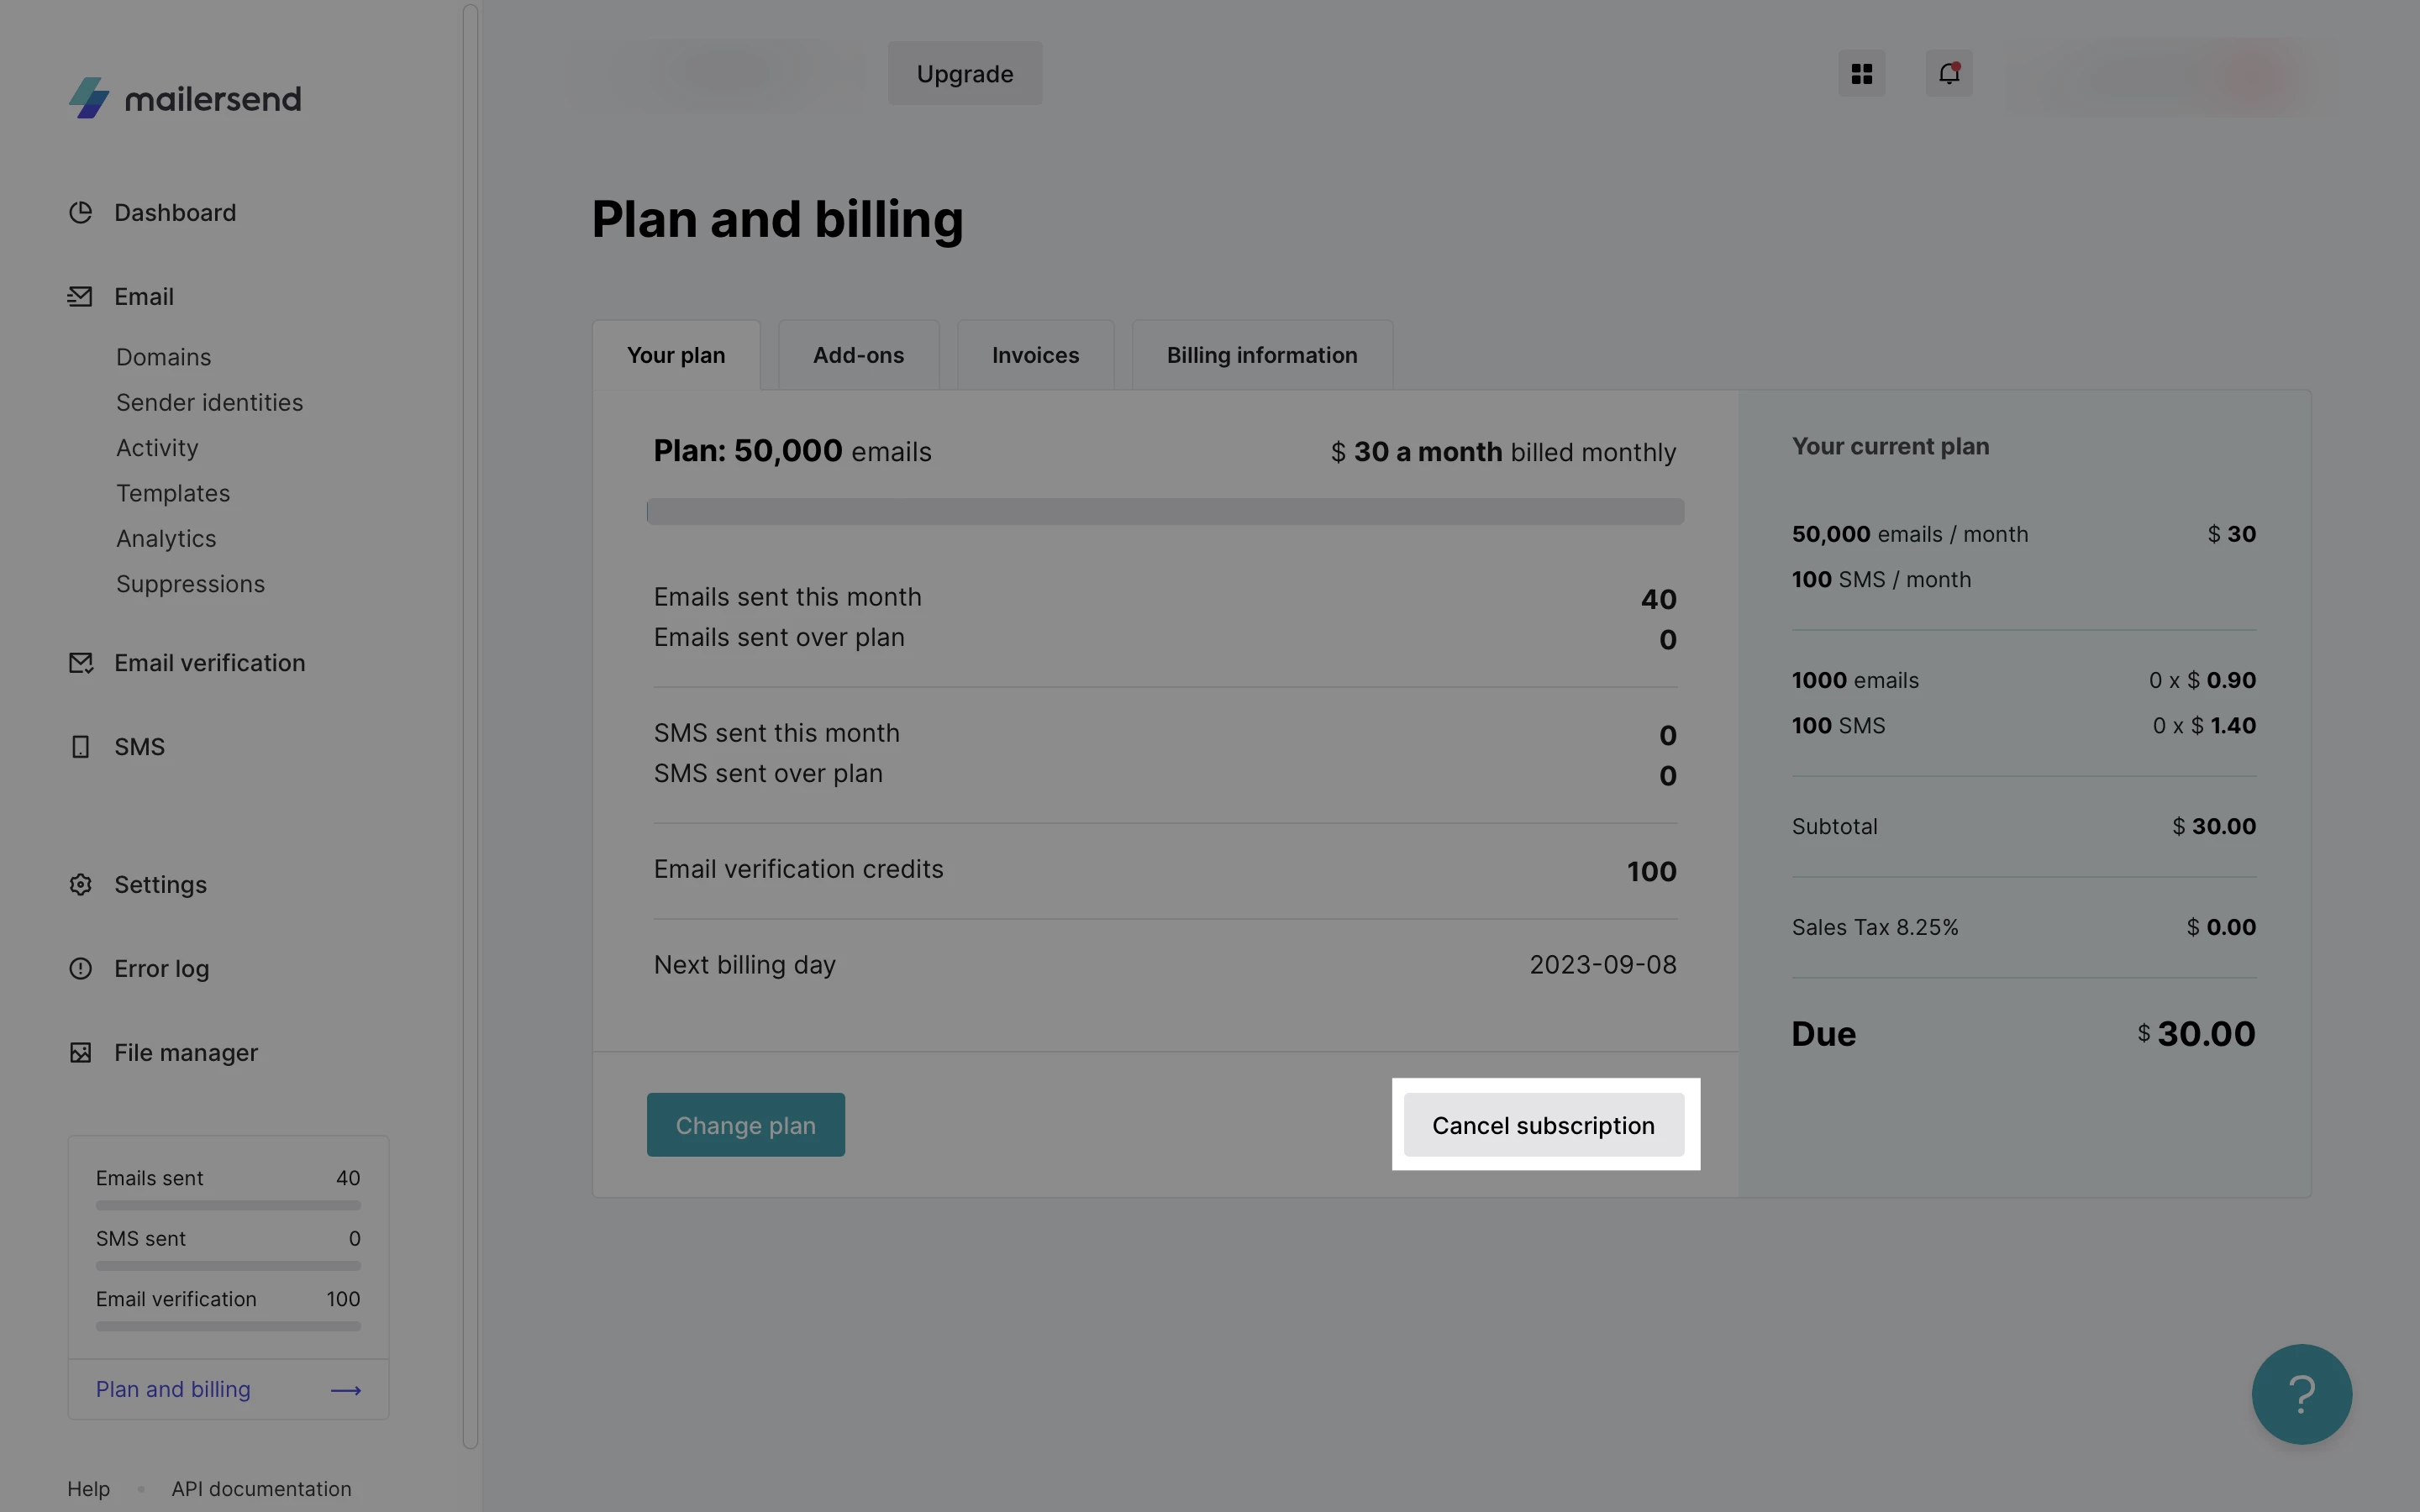
Your plan will remain active until the end of your current billing period.
After this, your account will revert back to the Trial plan and certain features may no longer be available such as:
Inbound routing
Live chat support
HTML & rich text editor
Bulk emailing
Usage limits will also downgrade to:
1 seat
1 sending domain
3 templates
7-day data retention
1,000 daily API requests
How to change your payment method
To change your payment method:
1. Navigate to the Plan and billing page.
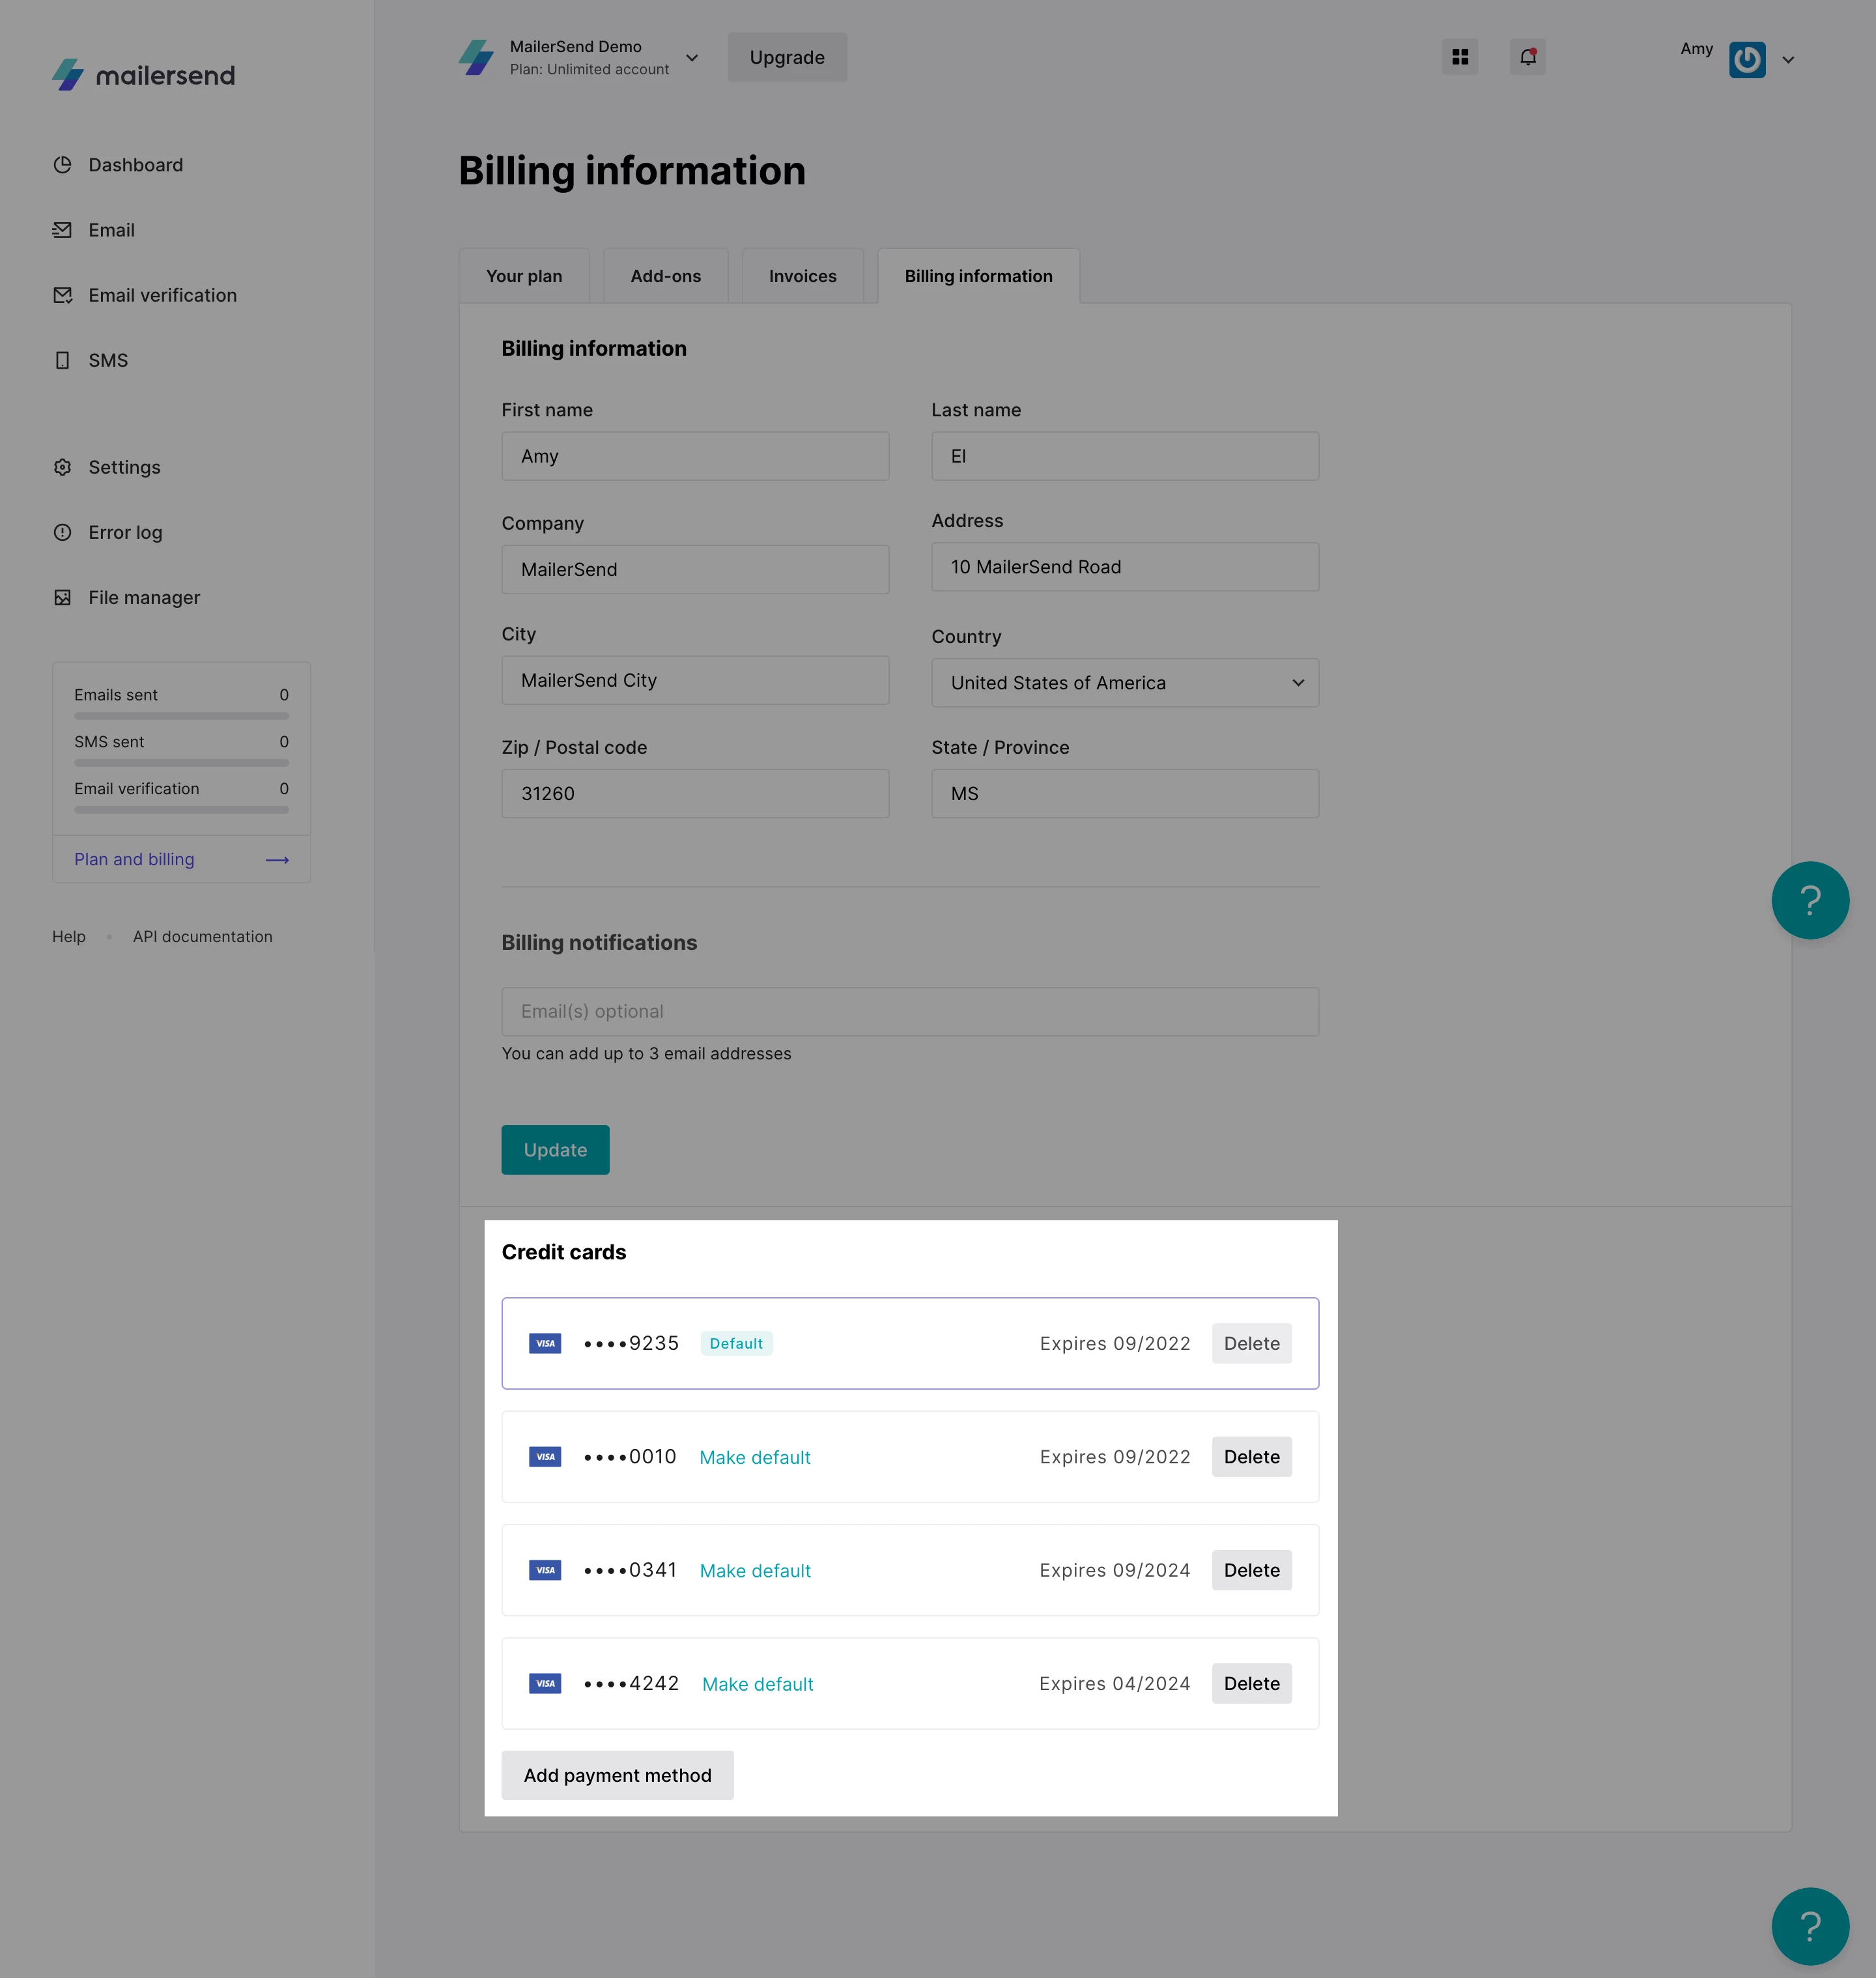
2. Click the Billing information tab.
3. Under Credit cards, click Add payment method.
4. Enter your new credit card information.
5. Select which card you would like to set as your default payment method by clicking Make as default.
Where to find your invoices
A copy of all your invoices is stored on your Plan and billing page under the Invoices tab.
Need more info?
Feel free to reach out to support@mailersend.com. A member of our support team will gladly assist you.
- Getting started
- FAQ
-
Features
- Sending domains
- Managing API tokens
- Domain tracking options
- How to add a domain space to your account
- SMTP relay
- Webhooks
- Inbound routing
- Templates
- How to add a survey to your emails
- Email tagging
- File manager
- Email and recipient activity
- Analytics
- Split Testing
- How to use the MailerSend iOS app
- Schedule bulk emails with the bulk endpoint
- Ensuring secure SMS communication: Verification and usage limits
- SMS: How to handle opt-in and opt-out
- Custom headers
- Upcoming changes to TLS Protocol support
- How to request a dedicated IP
- Deliverability
- Account settings
- Billing
- Integrations
- How to use personalization in emails
