Blog
Enable the use of email replies to post comments or messages


Plenty of web platforms offer the ability to respond to various interactions via email. Think reservation apps like Airbnb or Booking.com, or CSMs like HelpScout. It makes life easier for customers, who can respond directly from the email, as well as your users, who can view and manage messages from your app interface for improved efficiency and collaboration.
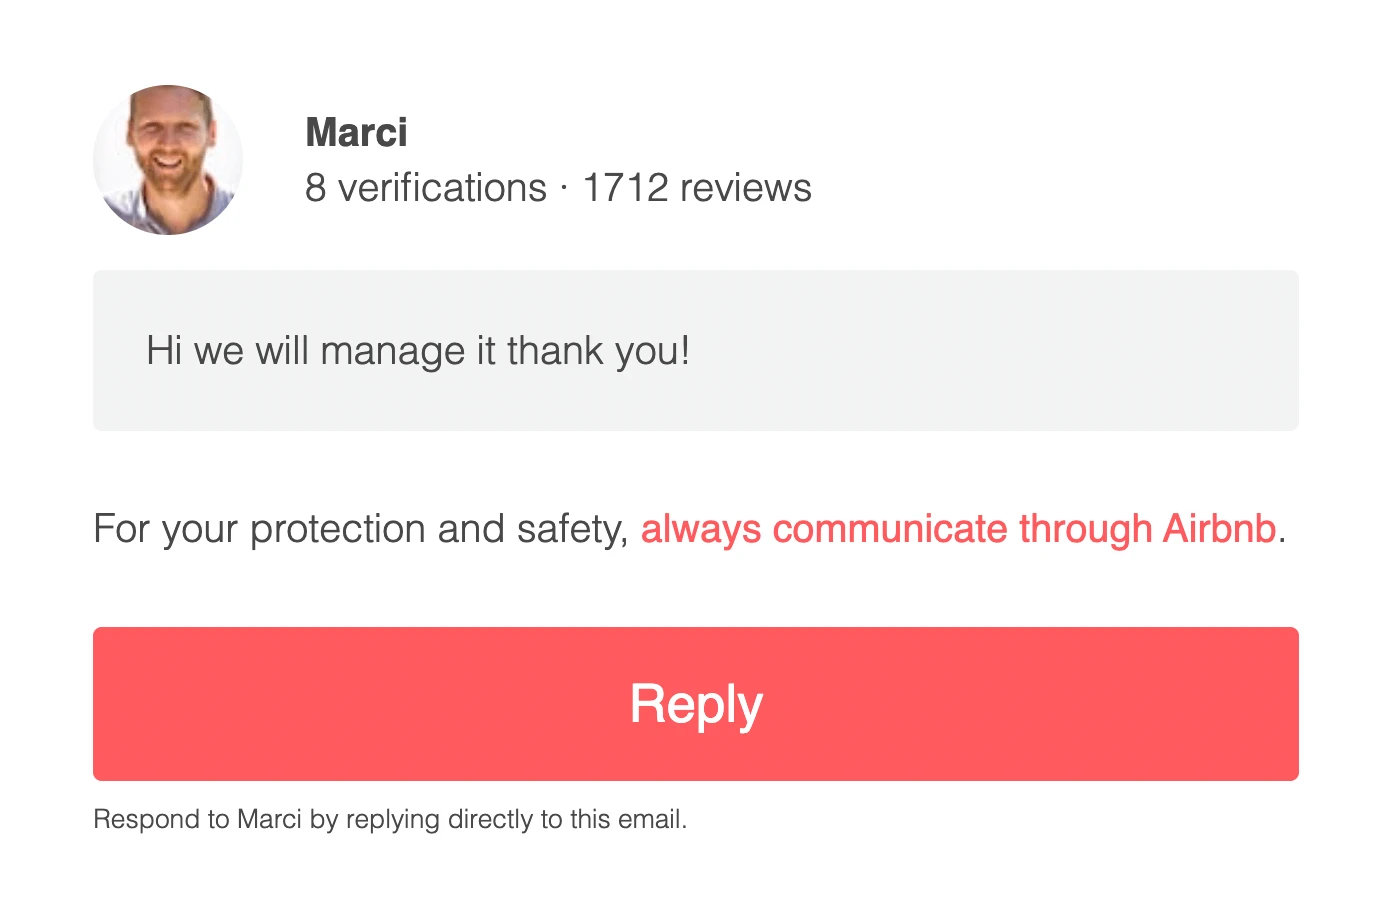
Here's an example from Airbnb with a note that the recipient can reply to a message within the app by replying to the email.
And here's another example from HelpScout.
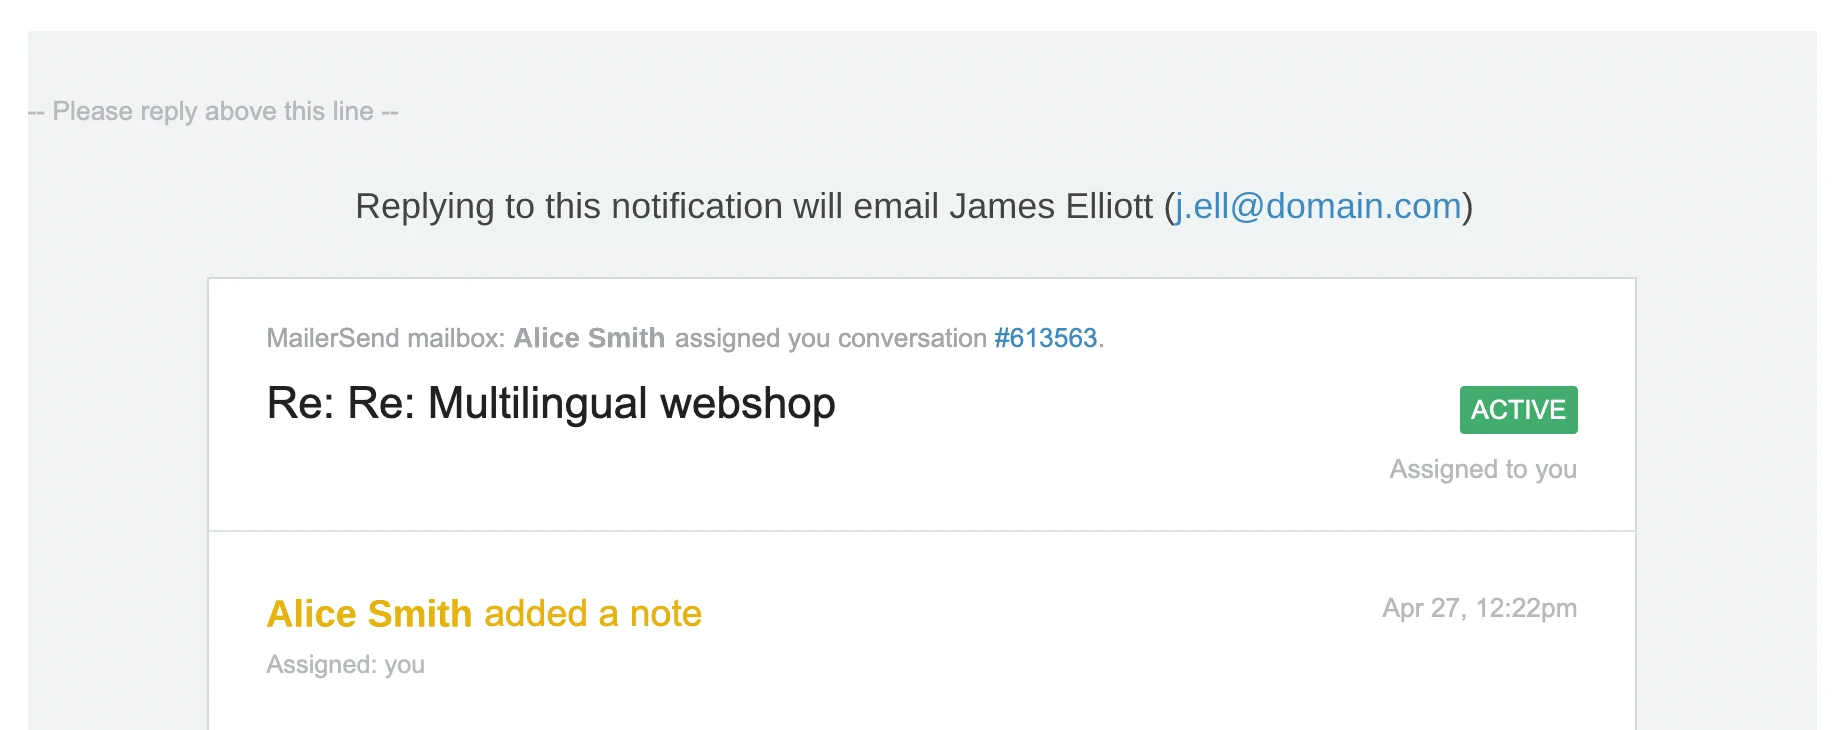
Sounds awesome! But for custom apps, creating this level of integration is a lot of work—which is one of the reasons it’s mostly adopted by large organizations. With MailerSend, the hard work is taken care of so you can enjoy the same advanced functionality as AirBnB or Uber!
You can configure your application to receive emails from MailerSend's API with inbound email routing. This means you can manage two-way conversations with your users via a commenting system. You can even parse attachments and forward them to your app via webhooks.
Integrating email into your app with a custom solution is tricky. For starters, the internet and email run on completely different protocols. You'd need to develop a mechanism and a mail daemon to poll the inbox of every relevant account. You'd also need fuzzy logic to scan the contents and attachments of each message and deliver it to the appropriate comment.
And that's not including email storage and logging requirements. It's a lot of work, to be sure. You can make your life much simpler by using MailerSend's inbound routing feature, just like MyZenTeam did! 👇
MyZenTeam is a hiring platform that enables users to create job listings, collaborate with team members, and communicate with potential candidates. As a product focused on the human experience—and not just numbers—efficient and productive communication is a top priority.
The challenge that developers were facing was to implement a feature that would enable users to send and receive email messages directly from the MyZenTeam dashboard, without the need to head to their inboxes to get replies. Their initial idea was to set a forwarding rule from the email client to MyZenTeam. This would involve using raw email parsing logic and storing email logs—something that the team agreed would not be a convenient solution.
They then decided to implement MailerSend. This way, the email could instead be forwarded to MailerSend where it would be parsed and details would be logged, and then it would finally be forwarded on to MyZenTeam.
After quickly setting up the webhook and inbound route, The MyZenTeam developers were able to implement this feature into the app, enabling users to view and manage entire email threads from the app interface, without having to go to their email inbox.
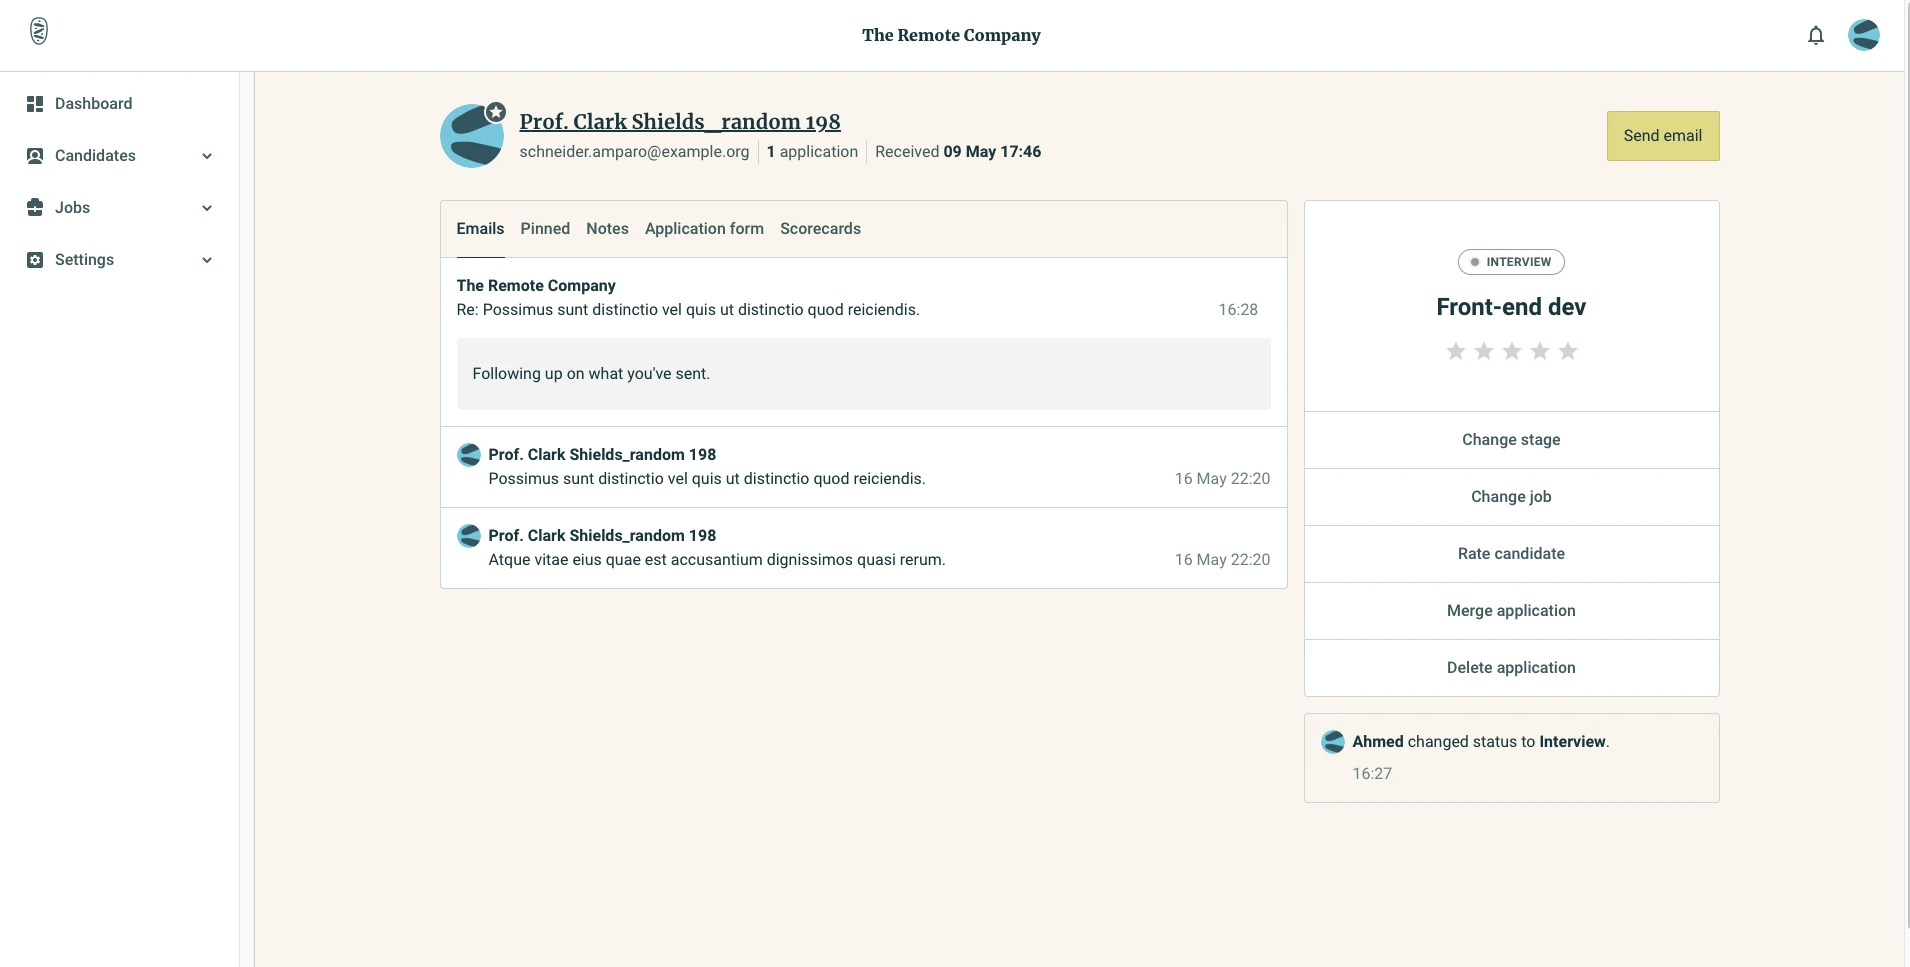
Pretty cool, right? Now we’ll share how you can set this up yourself, let’s get to it!
With MailerSend, posting comments with email replies is as easy as creating an API token, configuring an inbound route and linking it via a webhook. Inbound routing receives emails based on the filters you choose, parses the mails into JSON, and POSTs them to your application's endpoint URL.
If you haven't done so already, you'll need to create an API token under the Domains page and give it the appropriate permissions. If you opt to give your API token custom permissions, you'll need to provide full access to Email and Webhooks.
Keep in mind that once you've added an inbound route to your domain, all emails sent to that domain are logged in the inbound activity log section.
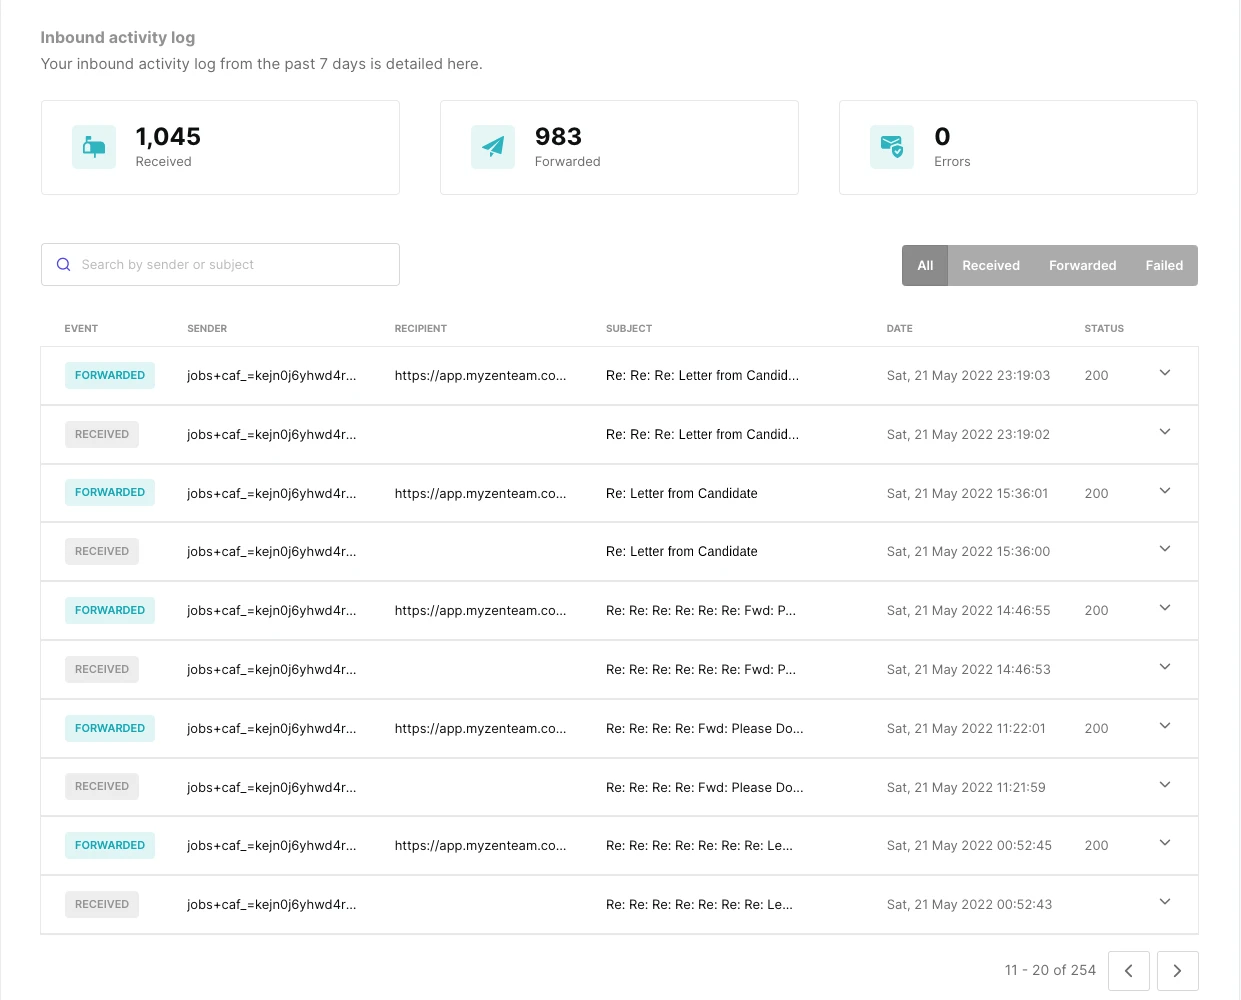
Set up a webhook URL in your app, it should be able to receive JSON payloads and answer back with a 500 error or a 200 OK status. Note that the inbound webhook has a retry mechanism.
To set up an inbound route, you'll need to head to the Domains page of your MailerSend account. If you haven't already done so, you'll need to verify your domain and configure your domain with MailerSend's DNS settings.
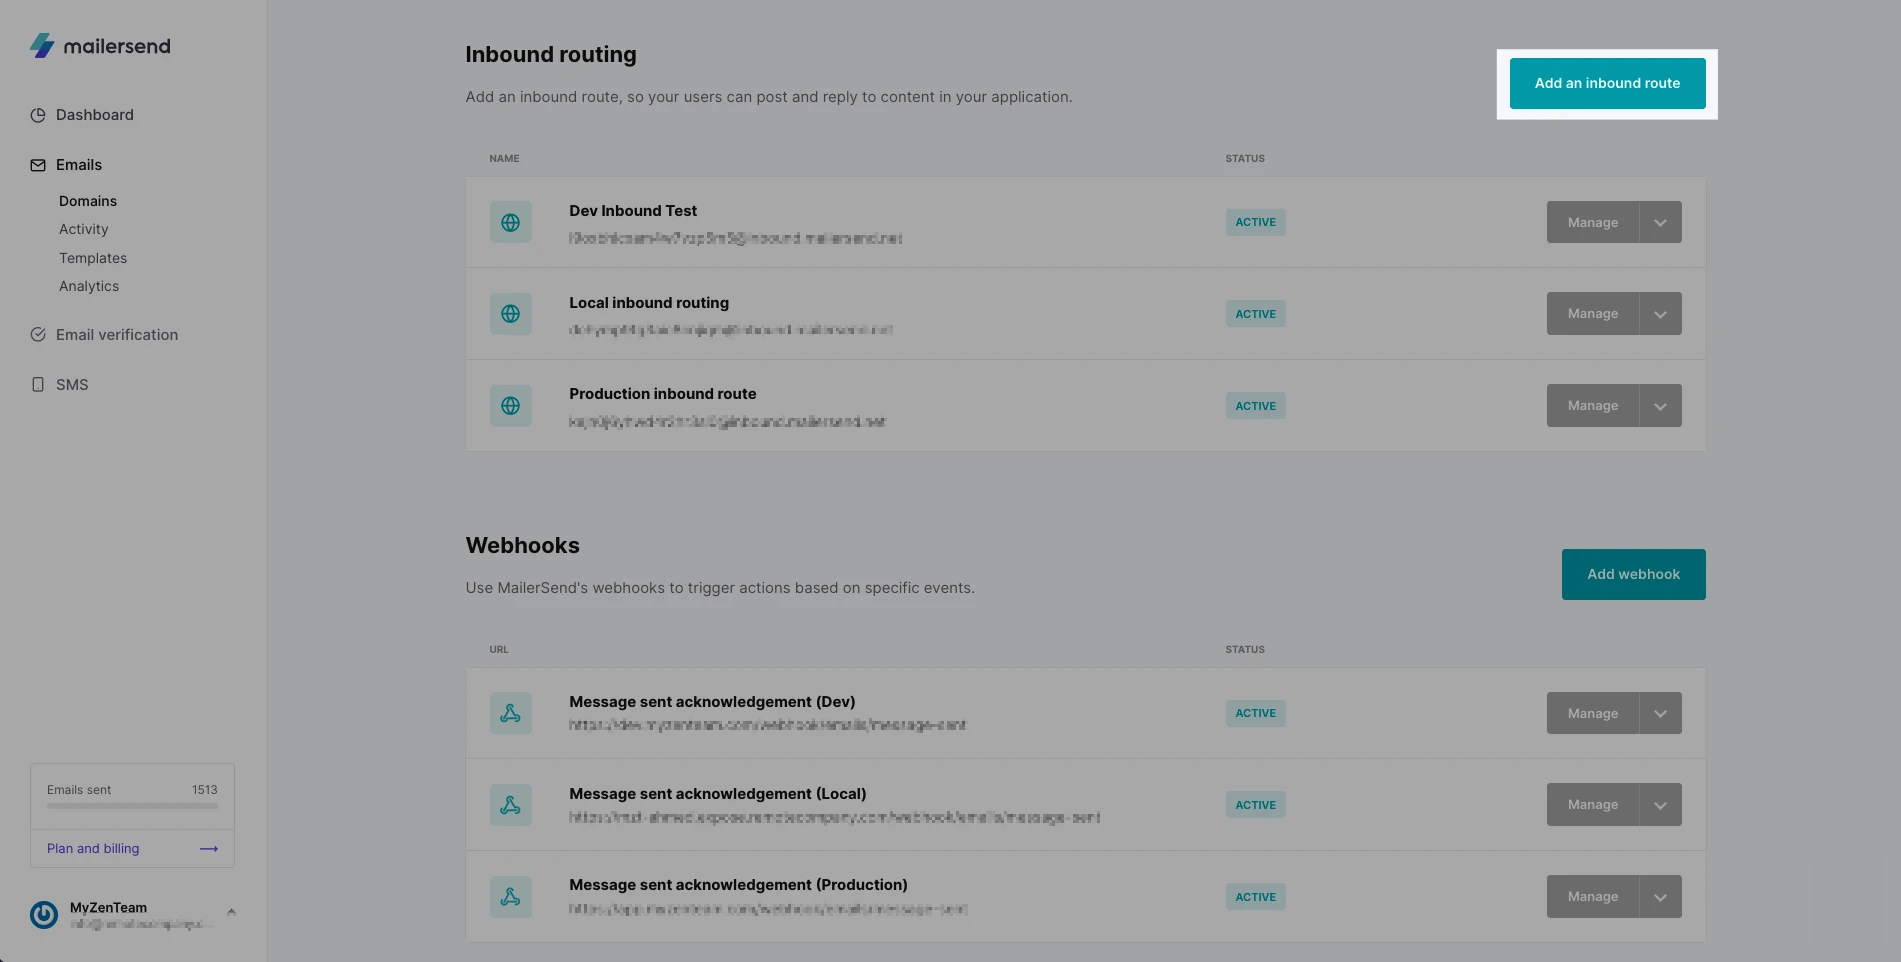
With your domain verified, follow these steps:
From the Domain page, scroll down to the Inbound route section and click Add an inbound route.
In the Name field, type a name for internal reference purposes.
In the Inbound address field, you'll see an automatically generated address. Use this or enter your own custom address. If using a custom address, you'll need to add a custom MX to your DNS management platform.
Check the box to enable Inbound domain forwarding.
Configure the Catch filters to select which inbound emails are accepted based on the address recipients are sending to.
Configure the Filter emails section to specify which emails are accepted based on the address recipients are sending from.
Finally, choose where the inbound route should route to and add the endpoint URL you previously created for your app.
Click ‘Save route” and you’re done!
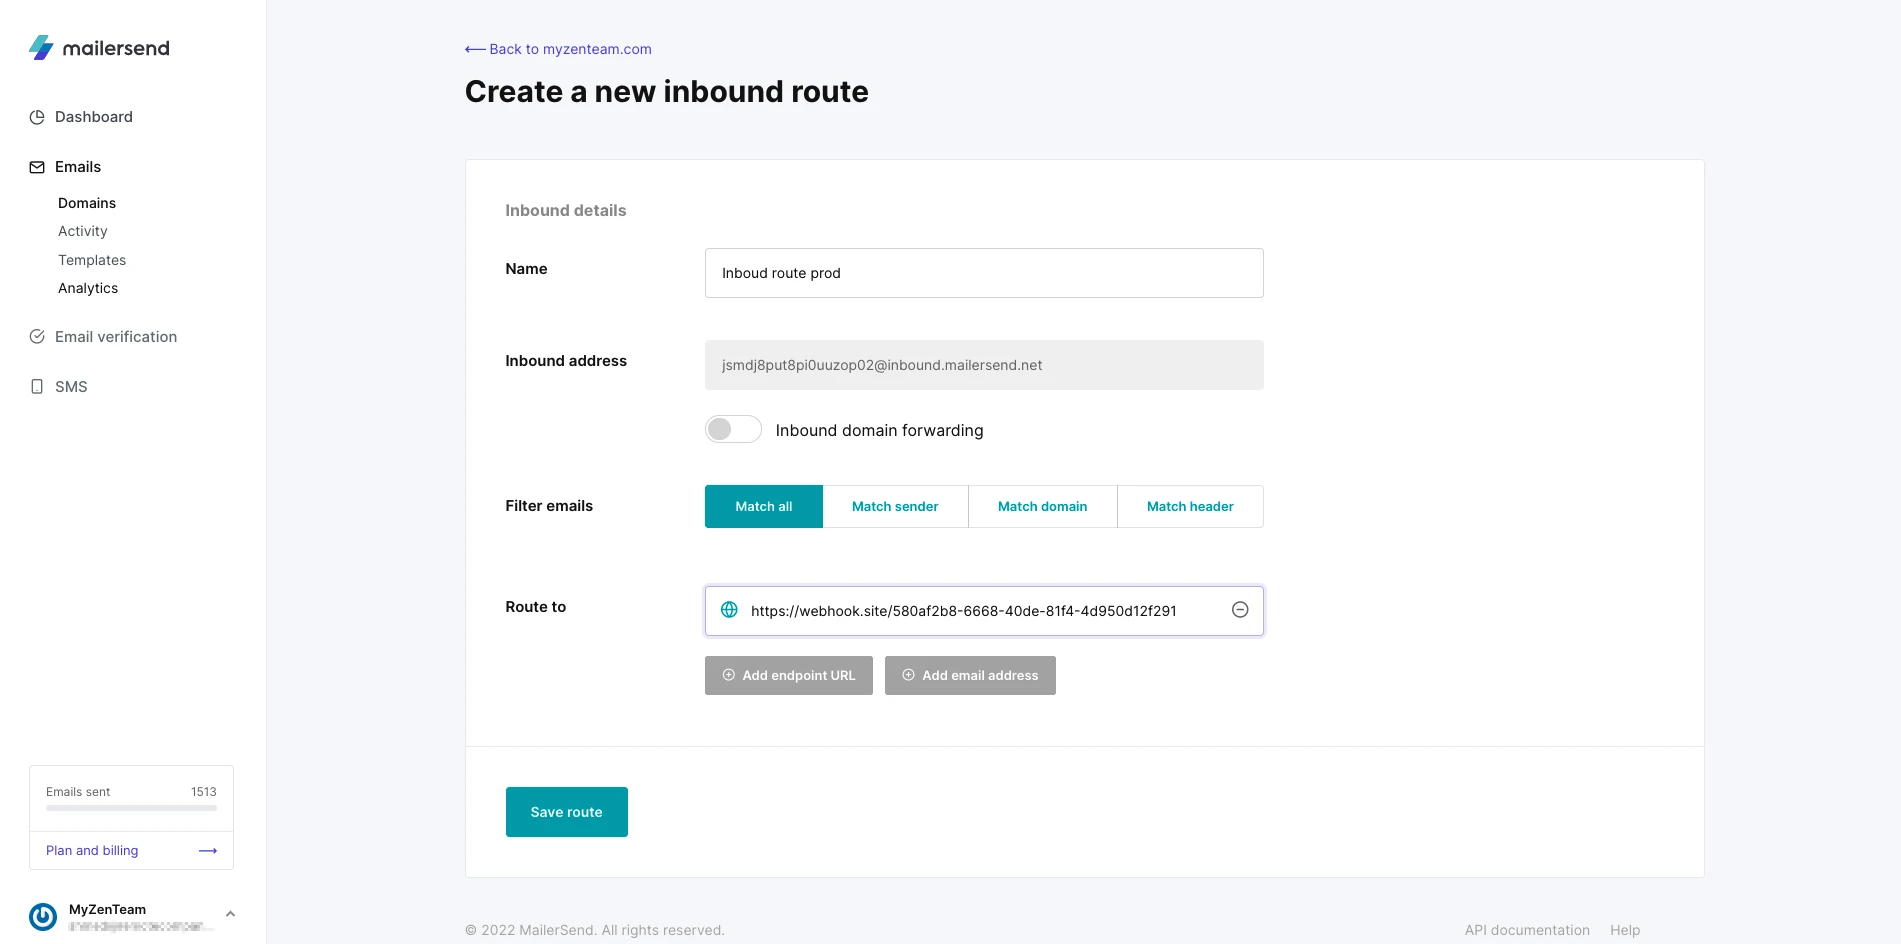
Your internal route is now configured and ready to use. If you have any issues, take a look at the full documentation for internal routes. Otherwise, let's set up a webhook so you can communicate with the MailerSend API.
How to create an inbound route via API:
To create a new inbound route to route incoming emails to your endpoint URL, use the following POST request:
POST https://api.mailersend.com/v1/inboundThe request body will look something like this, where under the forwards parameter, type will equal ‘webhook’ and value will equal your webhook URL.
{
   "domain_id":"7nxe3yjmeq28vp0k",
   "name":"Test name",
   "domain_enabled":true,
   "inbound_domain":"test.remotecompany.com",
   "inbound_address":"test@inbound.mailersend.net",
   "inbound_subdomain":"inbound",
   "match_filter":{
      "type":"match_all"
   },
   "catch_filter":{
      "type":"catch_recipient",
      "filters":[
         {
            "comparer":"equal",
            "value":"test"
         }
      ]
   },
   "forwards":[
      {
         "type":"webhook",
         "value":"https://www.mailersend.com/hook"
      }
   ]
}
And that's all there is to it. You now have real-time polling of inbound email threads based on the filters you set in your route. You can use the webhook's API key to access messages in your app and build a commenting system that enables you to respond via email.
With MailerSend's inbound routing feature, there are tons of possibilities. Using webhooks and your imagination, the sky's the limit.
If your app relies on email for communication, there's no need to have your users go to their inbox to follow the thread—simply integrate the whole experience within your app, like MyZenTeam did.
Some other ideas you can use inbound routing for:
Manage support emails from your application
Build a forum using email threads
Create a commenting plugin for websites
And that's just to name a few. If you're using MailerSend for your app's transactional email, relying on inbound routing for your communication needs is as simple as it gets. After all, there's no reason to reinvent the wheel.
Integrating inbound routes and email replies into your app doesn’t have to be difficult! Now you know how to set up transactional email to have replies parsed directly from email to your app, making communication for users and customers more efficient.
If you're looking for the simplest way to manage your app's email communication, MailerSend's email API is an excellent solution for handling both transactional emails and inbound routing. Save development time by using inbound routing to power your app's email messaging.
Ready to build an amazing feature in your app using MailerSend's inbound routing feature? Check out the API documentation to learn more. Let us know in the comments how you'll be using inbound routing.
Sign up to MailerSend for free and get 3,000 emails to start out with. Want to try out inbound routing for yourself? Upgrade to a Starter plan at any time.


