You can use PHP to quickly and easily start sending bulk SMS messages to your customers in minutes. Here’s how to add SMS sending to your stack.
With so many aspects of our daily lives carried out via our mobile phones, transactional SMS notifications are a great way for businesses to reach customers quickly and reliably. In fact, SMS has a 98%+ open rate, much higher than that of email.
So, if you want to reach more customers and enhance the brand experience, SMS is a no-brainer. The good news is, you can use good old PHP combined with an advanced rest API to effortlessly implement SMS sending.
Let’s take a look at how to send SMS messages (with PHP code examples) and best practices for sending transactional SMS.
What is PHP?
PHP (Hypertext Preprocessor) is a popular, server-side scripting language for web development. It’s an open-source language that allows for dynamic content generation, interaction with databases, and managing sessions. PHP’s ability to interface with APIs through HTTP requests, integration capabilities with web applications, and ability for server-side control make it the ideal language to send SMS with.
How to send text messages with PHP (using the MailerSend SMS API)
Combining MailerSend’s SMS API and the PHP SDK is a quick and easy way to start sending bulk SMS. But there are a few steps to take before you can start sending.
Note:
SMS is currently available in The U.S. and Canada. Availability in other regions is coming soon!
1. Log in to your MailerSend account or sign up for one if you haven’t already.
Note:
SMS is available for Starter, Professional and Enterprise plans. Accounts with these plans are supplied with a free trial phone number to test out the SMS API. Check out our plans and pricing to learn more.
2. You can use the free trial phone number to test the API or, if you’re ready to start sending text messages to customers, you can purchase a toll-free number.
To purchase a phone number:
Go to Plan and billing.
Select the Phone number add-on.
Choose a phone number and click Add to cart.
Complete the purchase and you’re ready to start sending SMS!
For more information, read How to purchase a phone number.
3. Next you’ll need to create an API token. Head to Integrations and in the MailerSend API section next to API tokens, click Use.
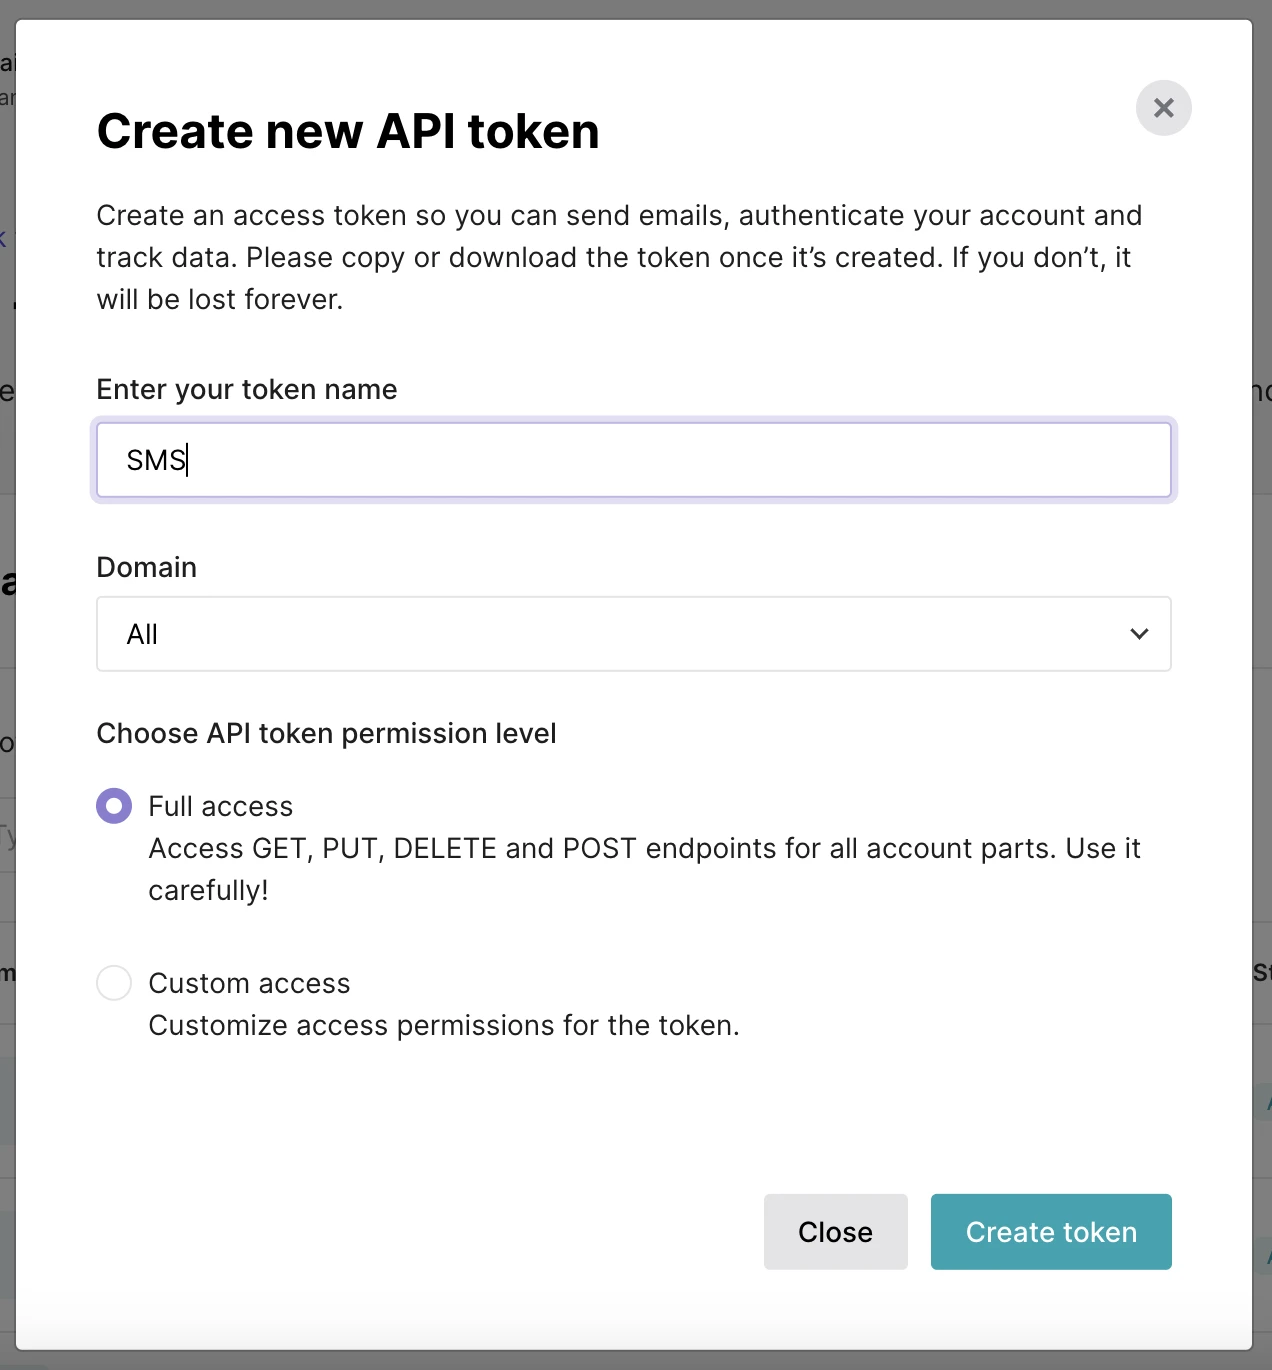
4. Click the Generate new token button and enter the details for your new API token. Under permissions, if you select Custom access, ensure that the SMS permission level is set to Full access.

Note:
You can also use an existing API token as long as it has full access permission.
5. Install the MailerSend PHP SDK:
composer require mailersend/mailersend
6. To start sending SMS, save the following code to a PHP file. Remember to set your API key.
use MailerSend\MailerSend;
use MailerSend\Helpers\Builder\SmsParams;

$mailersend = new MailerSend(['api_key' => 'key']);

$smsParams = (new SmsParams())
    ->setFrom('+12065550101')
    ->setTo(['+12065550102'])
    ->addRecipient('+12065550103')
    ->setText('This text message is a test.');

$sms = $mailersend->sms->send($smsParams);
7. Check the status of your text message. There are two ways to do this.
To check the status via API, use the following code:
use MailerSend\MailerSend;

$mailersend = new MailerSend(['api_key' => 'key']);

$smsMessage = $mailersend->smsMessage->find('sms_message_id');
Your message will either be processed, queued, sent, delivered, or failed. The response will look something like this:
{
	"data": {
		"id": "01h909rj94ybjnvpke60w866n6",
		"from": "+18332647501",
		"to": [
			"+16203221059"
		],
		"text": "This text message is a test.",
		"paused": false,
		"created_at": "2023-08-29T09:24:58.000000Z",
		"sms": [
			{
				"id": "01h909rjj42mjxcpkxv6asq1jn",
				"from": "+18332647501",
				"to": "+16203221059",
				"text": "This text message is a test.",
				"compiled_text": "This text message is a test.",
				"status": "sent",
				"segment_count": 1,
				"error_type": null,
				"error_description": null,
				"created_at": "2023-08-29T09:24:59.000000Z"
			}
		],
		"sms_activity": [
			{
				"from": "+18332647501",
				"to": "+16203221059",
				"created_at": "2023-08-29T09:24:59.000000Z",
				"status": "processed",
				"sms_message_id": "01h909rj94ybjnvpke60w866n6"
			},
			{
				"from": "+18332647501",
				"to": "+16203221059",
				"created_at": "2023-08-29T09:24:59.000000Z",
				"status": "queued",
				"sms_message_id": "01h909rj94ybjnvpke60w866n6"
			},
			{
				"from": "+18332647501",
				"to": "+16203221059",
				"created_at": "2023-08-29T09:24:59.000000Z",
				"status": "sent",
				"sms_message_id": "01h909rj94ybjnvpke60w866n6"
			}
		]
	}
}
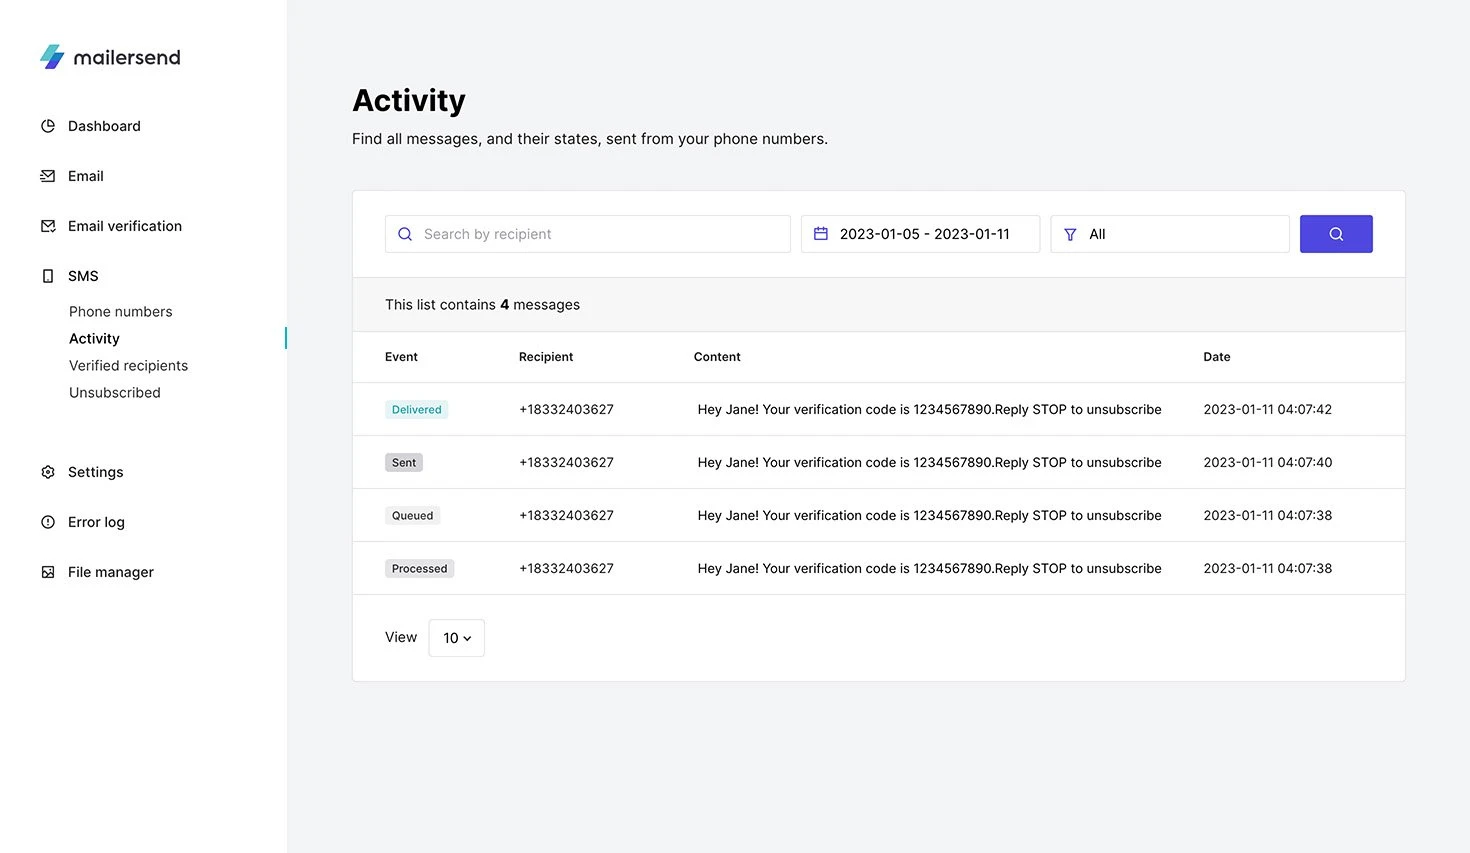
To check the status in the MailerSend app, simply navigate to SMS and Activity.
Personalization
You can add variables to your text messages using the personalization parameter. Personalization variables can be added to the text fields using {{ var }} syntax. Here is the sample code to send an SMS with a personalization variable.
use MailerSend\MailerSend;
use MailerSend\Helpers\Builder\SmsParams;

$mailersend = new MailerSend(['api_key' => 'key']);

$smsParams = (new SmsParams())
	->setFrom('+12065550101')
	->setTo(['+12065550102'])
	->setText('Text {{ var }}')
	->setPersonalization([
    	new SmsPersonalization('+12065550102', [
        	'var' => 'variable',
        	'number' => 123,
        	'object' => [
            	'key' => 'object-value'
        	],
        	'objectCollection' => [
            	[
                	'name' => 'John'
            	],
            	[
                	'name' => 'Patrick'
            	]
        	],
    	])
	]);

$sms = $mailersend->sms->send($smsParams);
Request parameters
You can use the following parameters in your PHP requests.
From: The phone number of the sender in E164 format, e.g. +16175551212.
To: The phone number of the recipient(s) in E164 format.
Text: The contents of the text message
For the personalization of each text message, add the “personalization” object with each phone number and data objects as key: value pairs.
 "personalization": [
      {
        "phone_number": "+19191234567",
        "data": {
          "name": "Dummy"
        }
      }
    ]
SMS response codes and error messages
When you send a request to send an SMS, MailerSend will check that your text message is valid. Your SMS will then either be queued or sent, and if found to be invalid, you’ll receive an error response.
If there are no errors, you’ll receive the following response:
Sending queued response
Response Code: 202 Accepted
Response Headers:
	Content-Type: text/plain; charset=utf-8
	X-SMS-Message-Id: 5e42957d51f1d94a1070a733
Response Body: [EMPTY]
If your from phone number cannot be validated, you’ll receive the following validation error message:
Response Code: 422 Unprocessable Entity
Response Headers:
	Content-Type: application/json

{
  "message": "The given data was invalid.",
  "errors": {
    "from": [
      "The from field contains an invalid number."
    ]
  }
}
Check out MailerSend’s other API response codes and our API reference docs. You may have an error due to the to number not being in an E164 format or the personalization data not being on the list of to recipients.
Best practices for sending SMS with PHP
1. Use a valid sender number
To ensure that your text messages are sent without errors, and to provide the best possible experience for recipients, make sure you send your messages from a valid phone number. The number has to be a trial number or active on your account.
2. Use the E164 format
When entering phone numbers for senders and recipients, you must stick to the E164 format. This includes a maximum of 15 digits, and numbers start with a plus sign (+) followed by the country code (e.g. 1 for the U.S.) and the mobile number.
3. Remember your character limits
If using GSM-7 encoding, you can include up to 160 characters per segment. If using UCS-2 encoding, for languages such as Arabic, Chinese, Korean, or Cyrillic alphabet languages, etc., there is a limit of up to 70 characters per segment. UCS-2 encoding is also used for sending emojis.
In MailerSend, there are no limits to the number of characters—or segments—you can send, however, you will be billed by segment.
4. Provide unsubscribe instructions
To be in accordance with MailerSend’s terms of use and the Cellular Telecommunications Industry Association’s (CTIA) guidelines, you must provide a way for recipients to opt out of receiving your text messages. To do this, you can use the STOP command, which allows recipients to reply to your text with “STOP”, “Stop” or “stop” to opt out.
Learn more about SMS compliance and head over to our guide on how to handle opt in and opt out for SMS.
5. Verify your phone number in MailerSend
When you purchase a new phone number, you’ll need to verify it. This involves providing some details about your company and how you plan to use SMS. Without verifying your phone number, you’ll have a daily SMS sending limit of 1,000.
MailerSend pricing
MailerSend’s flexible pricing makes it easy to get started with SMS and scale your sendings as necessary. Our Starter plan starts at just $28 a month for 50,000 emails and 100 SMS. After that, you’ll only pay for the additional SMS you send, at a rate of $1.40/100 SMS.
Need more text messages? You can easily upgrade your plan to increase your SMS quota and get better pricing on additional SMS.
Check out our plans and pricing.
Sending SMS with PHP is simple
By using an advanced SMS API, ready-to-go PHP SDK, and the examples above you can start sending personalized text messages directly to customers' phones in minutes. Just remember to follow technical best practices, obtain opt-in consent, and use a provider that follows CTIA guidelines.
What language do you use to send text messages? Let us know in the comments!


