Guide to sending SMS messages from your Node.js application
Transactional messaging is a cornerstone of user experience, and customers and users are well-habituated to receiving important notifications by email. But, with the majority of us reaching for our mobile phones to do just about everything, text messages are becoming an ever more popular method of transactional communication.
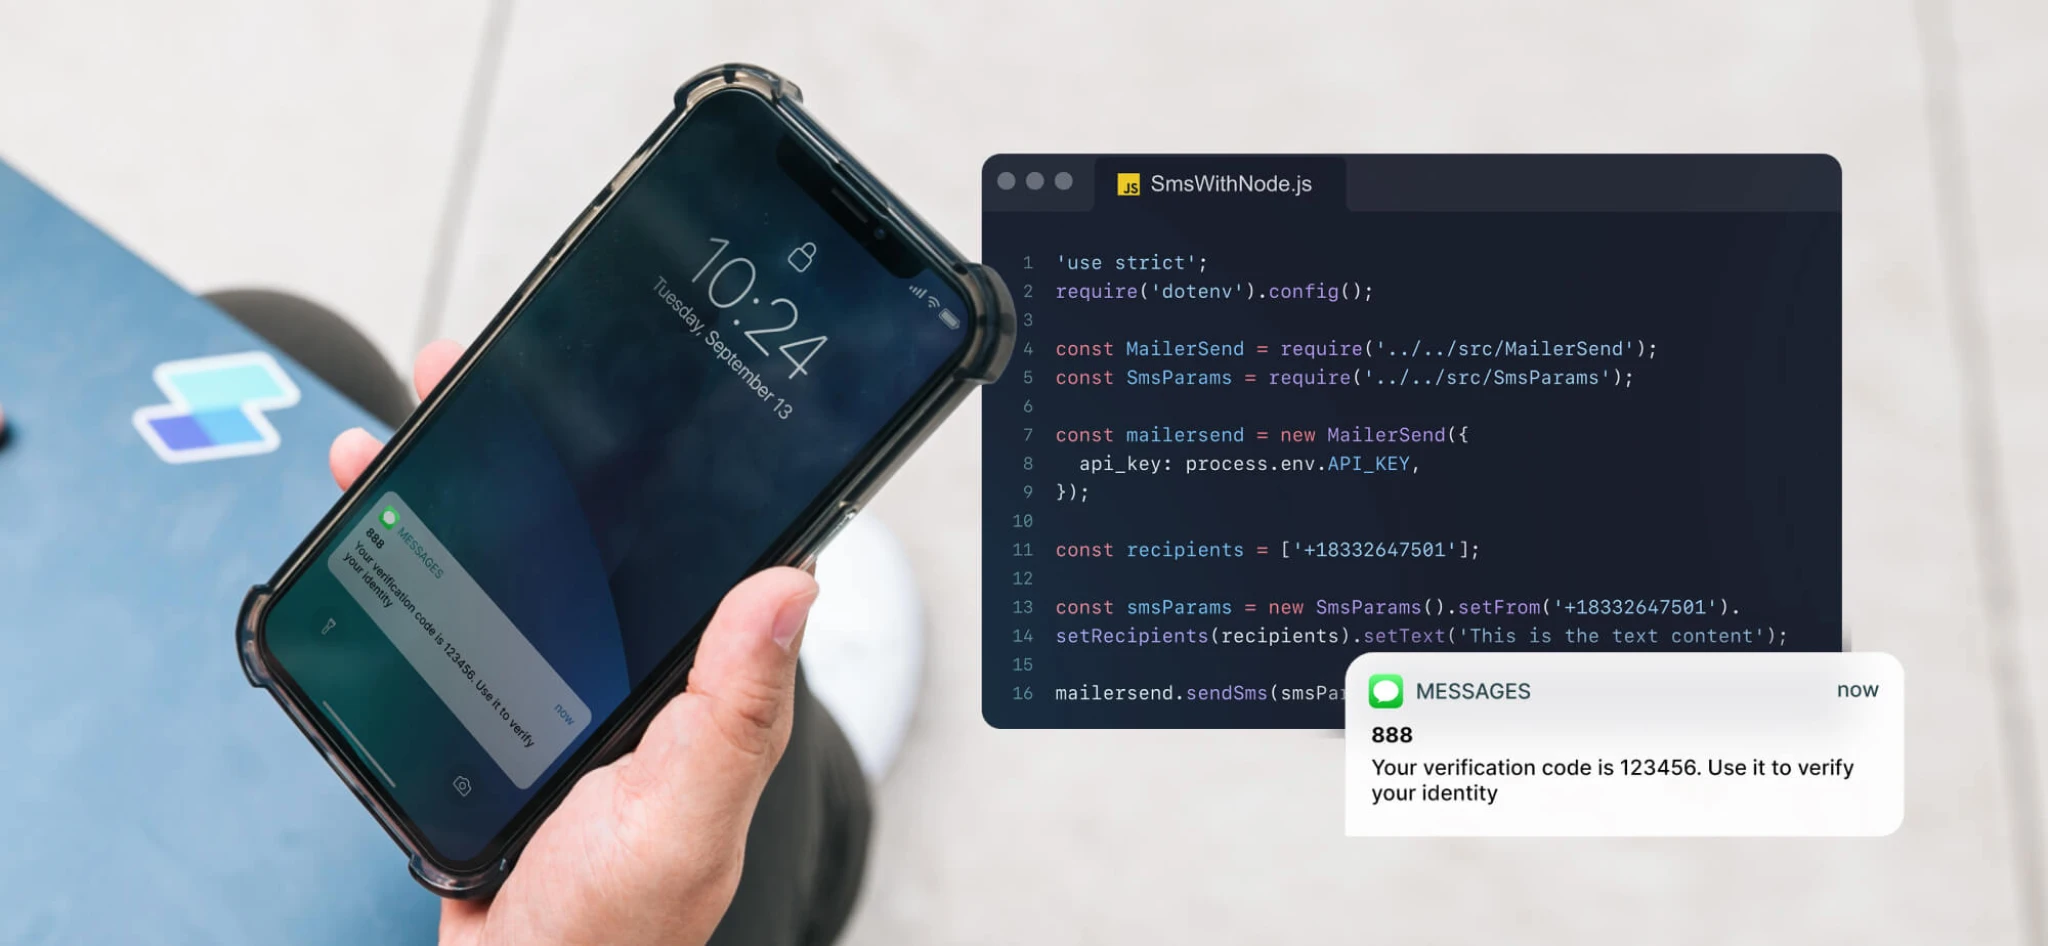
With an SMS API, it’s easier than you might imagine to send SMS notifications from your Node.js application. In this article, we’ll show you exactly how you can get started, along with some code examples and best practices for pain-free setup, testing, and sending.
What you need to send SMS with Node.js
For this tutorial, we’ll go through how to set up SMS sending from your app with an SMS messaging API and Node.js SDK from MailerSend (which also has SDKs for Java, PHP, Python, Ruby, and Laravel).
MailerSend’s SMS feature is currently available in North America. Availability in other regions is coming soon.
Prerequisites
The basic prerequisites for getting started sending SMS with MailerSend and Node.js are:
1. An active MailerSend account on the Starter plan or above.
2. An SMS-enabled phone number. All accounts are provided with a free trial phone number to test out the SMS API or you can go ahead and purchase a phone number in the Add-ons section. You will need to verify your phone number.
3. An API key with the appropriate permissions. Learn more about managing and creating API keys.
4. Node.js installed. We recommend downloading the long-term support (LTS) version. You can download Node.js from the website.
Check out our API documentation, GitHub repository, and guide to getting started with SMS.
How to start sending SMS messages from your Node.js application
Assuming you’ve signed up to MailerSend, enabled a phone number, created an API key, and installed Node.js, we’ll start by creating a new project and installing the MailerSend SDK.
1. Create a new Node.js project by running the following command in your project directory and following the prompts:
npm init2. Install the MailerSend package:
npm install mailersendIt’s recommended that you use environment variables to make sensitive data (like API keys) more secure. To do this, run:
npm install dotenv --saveAnd create a .env file in the root directory of your project named .env, and add your variables to it. For our examples, we’ll use API_KEY and SMS_FROM. The file should look like this:
API_KEY=Your_API_Key_Here
SMS_FROM=Your_SMS_Phone_Number
Now you’re ready to send an SMS!
Send a simple SMS with Node.js
To send an SMS message, let’s create a new file and name it send_sms.js to keep things simple. Enter the following code example into your file:
require('dotenv').config();
const { MailerSend, SMSParams } = require('mailersend');

// Initialize MailerSend with API key
const mailerSend = new MailerSend({
  apiKey: process.env.API_KEY, // Store your API key in .env
});

// Function to send an SMS
async function sendSMS(recipientPhoneNumber, message) {
  const smsParams = new SMSParams()
    .setFrom(process.env.SMS_FROM) // Your MailerSend SMS-enabled number
    .setTo([recipientPhoneNumber]) // Recipient's phone number
    .setText(message); // SMS message content

  try {
    const response = await mailerSend.sms.send(smsParams);
    console.log('✅ SMS sent successfully:', response);
  } catch (error) {
    console.error('❌ Error sending SMS:', error.response?.data || error.message || error);
  }
}

// Example Usage
const recipientPhone = '+1234567890'; // Replace with actual phone number
const messageText = 'Hello! This is a test message from MailerSend.';
sendSMS(recipientPhone, messageText);
Send an OTP text message with Node.js
OTPs (One-time Passwords) and 2FA (Two-factor authentication) messages are very common use cases for transactional messages. They can be sent as emails, but SMS is a good solution as it provides a bit more security in case the user’s email account has been compromised. SMS messages can also be more convenient for the user.
You can use this code example to send an OTP message, editing placeholders and content where necessary:
require('dotenv').config();
const { MailerSend, SMSParams } = require('mailersend');

// Placeholder database (Replace this with a real DB later)
const otpDatabase = new Map(); // Key: phone number, Value: { otp, expiresAt }

// Initialize MailerSend
const mailerSend = new MailerSend({
  apiKey: process.env.API_KEY,
});

// Function to generate a 6-digit OTP
const generateOTP = () => Math.floor(100000 + Math.random() * 900000).toString();

// Function to send an OTP SMS & store OTP in the placeholder database
async function sendOTP(userPhoneNumber) {
  const otp = generateOTP();
  const expiresAt = Date.now() + 5 * 60 * 1000; // OTP expires in 5 minutes
  console.log(`Generated OTP for ${userPhoneNumber}: ${otp}`);

  const smsParams = new SMSParams()
    .setFrom(process.env.SMS_FROM)
    .setTo([userPhoneNumber])
    .setText(`Your verification code is: ${otp}`);

  try {
    await mailerSend.sms.send(smsParams);
    console.log('SMS sent successfully');

    // Store OTP in the placeholder database
    otpDatabase.set(userPhoneNumber, { otp, expiresAt });
    console.log(`OTP stored for ${userPhoneNumber} (expires in 5 minutes)`);
  } catch (error) {
    console.error('Error sending SMS:', error.response?.data || error.message || error);
  }
}

// Function to verify OTP
function verifyOTP(userPhoneNumber, enteredOTP) {
  const otpRecord = otpDatabase.get(userPhoneNumber);

  if (!otpRecord) {
    console.log('OTP not found or expired');
    return false;
  }

  const { otp, expiresAt } = otpRecord;

  if (Date.now() > expiresAt) {
    console.log('OTP expired');
    otpDatabase.delete(userPhoneNumber); // Remove expired OTP
    return false;
  }

  if (enteredOTP === otp) {
    console.log('OTP verified successfully');
    otpDatabase.delete(userPhoneNumber); // Remove OTP after successful verification
    return true;
  } else {
    console.log('Invalid OTP');
    return false;
  }
}

// Example Usage
const userPhoneNumber = '+1234567890';
sendOTP(userPhoneNumber);

// Simulate OTP verification after user enters it
setTimeout(() => {
  const isValid = verifyOTP(userPhoneNumber, '123456'); // Replace with actual OTP input
  console.log(isValid ? '✅ Access Granted' : '❌ Access Denied');
}, 10000); // Simulates user entering OTP after 10 seconds
In this code, we’ve added database storage to easily validate OTPs, prevent reuse, and set an expiry time.
Send a survey via SMS
As well as sending messages via SMS, you can also use inbound routing to receive SMS messages. With this example, we’ll set up a simple survey SMS that recipients can reply to. We’ll then use an inbound route and webhook to process the reply.
Here’s how it will work:
Step 1: We’ll create the sendSurveySMS function which when called, will send an SMS of the survey asking the recipient to reply. Here’s the sample code:
require('dotenv').config();
const { MailerSend, SMSParams } = require('mailersend');

// Initialize MailerSend with your API key
const mailerSend = new MailerSend({
  apiKey: process.env.API_KEY,  // Use your MailerSend API key
});

// Function to send the survey SMS
async function sendSurveySMS(userPhoneNumber) {
  const smsParams = new SMSParams()
    .setFrom(process.env.SMS_FROM)  // Your SMS-enabled number from MailerSend
    .setTo([userPhoneNumber])  // Recipient's phone number
    .setText('We value your feedback! Please rate your experience by replying to this message with a number from 1-10.');

  try {
    const response = await mailerSend.sms.send(smsParams);
    console.log('Survey SMS sent successfully:', response);
  } catch (error) {
    console.error('Error sending survey SMS:', error.response?.data || error.message || error);
  }
}

// Example usage
const userPhoneNumber = '+1234567890';  // Replace with the user's phone number
sendSurveySMS(userPhoneNumber);
Step 2: Set up an inbound route in MailerSend. From the MailerSend dashboard, go to SMS > Phone numbers > Manage and create an inbound route.
Set up the inbound route to forward SMS replies to your webhook URL.
When the recipient replies, MailerSend parses the response and forwards it to a webhook URL that we’ve defined. The JSON payload will look something like this:
{
  "from": "+1234567890",  // Sender's phone number
  "text": "8"  // The response (rating) from the recipient
}
Step 3: Set up a webhook endpoint in your Express.js app to process the recipient’s response when MailerSend forwards it:
require('dotenv').config();
const express = require('express');

const app = express();
const PORT = process.env.PORT || 3000;

// Middleware to parse incoming JSON data
app.use(express.json());

// Webhook route to capture SMS responses from MailerSend
app.post('/sms-webhook', (req, res) => {
  try {
    // Extract relevant information from the request body
    const { from, text } = req.body;  // Data from MailerSend webhook
    const rating = parseInt(text.trim(), 10);  // Convert the response to a number

    // Validate the rating (must be between 1-10)
    if (isNaN(rating) || rating < 1 || rating > 10) {
      console.log(`⚠️ Invalid response from ${from}: ${text}`);
      return res.status(400).send('Invalid rating. Please reply with a number from 1-10.');
    }

    // Store the rating or process it as needed (e.g., save to database)
    console.log(`✅ Survey response from ${from}: ${rating}`);
    res.status(200).send('Thank you for your feedback!');  // Acknowledge the response
  } catch (error) {
    console.error('❌ Error processing SMS response:', error);
    res.status(500).send('Server error');
  }
});

// Start the server
app.listen(PORT, () => {
  console.log(`🚀 Webhook server running on http://localhost:${PORT}/sms-webhook`);
});
The webhook will process the response, validate it, and handle the data. In our example, if the recipient's response is invalid, they’ll be sent a message asking them to reply with a correct response. If their response is valid, they’ll receive a thank you message and the response will be stored or processed as defined.
Send an appointment reminder SMS
Another common use case for transactional SMS messages is appointment reminders. The sample code below will send an appointment reminder prompting recipients to reply with one of three options.
require("dotenv").config();
const { MailerSend, SMSParams } = require("mailersend");

// Initialize MailerSend with API key
const mailerSend = new MailerSend({
  apiKey: process.env.API_KEY,
});

// Function to send an appointment reminder
async function sendAppointmentReminder(userPhoneNumber, appointmentDateTime) {
  const smsParams = new SMSParams()
    .setFrom(process.env.SMS_FROM) // Your MailerSend SMS-enabled number
    .setTo([userPhoneNumber]) // Recipient's phone number
    .setText(`Reminder: You have an appointment on ${appointmentDateTime}. Please reply 'CONFIRM', 'RESCHEDULE', or 'CANCEL'.`);

  try {
    const response = await mailerSend.sms.send(smsParams);
    console.log("Appointment reminder sent successfully:", response);
  } catch (error) {
    console.error("Error sending appointment reminder:", error.response?.data || error.message || error);
  }
}

// Example usage
const userPhoneNumber = "+1234567890"; // Replace with the recipient's phone number
const appointmentDateTime = "Feb 15, 2025, at 3:00 PM"; // Replace with the appointment date and time
sendAppointmentReminder(userPhoneNumber, appointmentDateTime);
You can then use a similar inbound routing setup as the previous example to process the response and send the appropriate response back.
require("dotenv").config();
const express = require("express");
const { MailerSend, SMSParams, EmailParams } = require("mailersend");

const app = express();
const PORT = process.env.PORT || 3000;

// Initialize MailerSend
const mailerSend = new MailerSend({
  apiKey: process.env.API_KEY,
});

// Define the sender's email and phone number
const SENDER_EMAIL = "your_email@yourdomain.com"; // Replace with sender's email
const SENDER_PHONE = "+11234567890"; // Replace with sender's phone number (for SMS)

app.use(express.json());

// Function to send an email notification
async function sendEmailNotification(subject, message) {
  const emailParams = new EmailParams()
    .setFrom(SENDER_EMAIL)
    .setTo([SENDER_EMAIL]) // Sending to yourself (the business owner)
    .setSubject(subject)
    .setHtml(message);

  try {
    await mailerSend.email.send(emailParams);
    console.log("📧 Email notification sent successfully!");
  } catch (error) {
    console.error("❌ Error sending email notification:", error);
  }
}

// Function to send an SMS notification
async function sendSmsNotification(message) {
  const smsParams = new SmsParams()
    .setFrom(process.env.SMS_FROM)
    .setTo([SENDER_PHONE])
    .setText(message);

  try {
    await mailerSend.sms.send(smsParams);
    console.log("📱 SMS notification sent successfully!");
  } catch (error) {
    console.error("❌ Error sending SMS notification:", error.response?.data || error.message || error);
  }
}

// Webhook to handle user responses
app.post("/sms-webhook", async (req, res) => {
  try {
    const { from, text } = req.body;
    const response = text.trim().toLowerCase();

    let notificationMessage = `Response from ${from}: ${text}`;

  if (response === "confirm") {
      console.log(`✅ Appointment confirmed by ${from}`);
      res.status(200).send("Thank you! Your appointment is confirmed.");
    } else if (response === "reschedule") {
      console.log(`🔄 Reschedule request received from ${from}`);
      res.status(200).send("We’ll contact you to reschedule your appointment.");
    } else if (response === "cancel") {
      console.log(`❌ Cancellation request received from ${from}`);
      res.status(200).send("Your appointment has been cancelled.");
    } else {
      console.log(`⚠️ Unrecognized response from ${from}: ${text}`);
      res.status(400).send("Please reply with 'CONFIRM', 'RESCHEDULE' or              'CANCEL'.");
    }

    // Notify the sender via Email & SMS
    await sendEmailNotification("Appointment Response Received", notificationMessage);
    await sendSmsNotification(notificationMessage);
  } catch (error) {
    console.error("❌ Error processing SMS response:", error);
    res.status(500).send("Server error");
  }
});

// Start the server
app.listen(PORT, () => {
  console.log(`🚀 Webhook running on http://localhost:${PORT}/sms-webhook`);
});
Here we’ve included a function to send SMS and email notifications to the sender to inform them of the recipient’s response. You could also set this up to update the recipient’s information in a database or CRM.
Tips for testing your SMS implementation
1. Use test phone numbers for sending and receiving
Never send any text messages to real recipients during the testing and implementation phase. If possible, use a sandbox or test phone number for sending as well. All MailerSend users on the Starter plan and above are given a free phone number for testing purposes.
2. Log API responses and monitor activity
Error and response logs are invaluable for troubleshooting and will give you better visibility into the configuration of your API calls, allowing you to more easily confirm success and identify errors.
3. Make use of Debug mode
Enable Debug mode for Node.js to see full API responses when you run your script.
4. Test error responses
As well as making sure your scripts work as intended when successful, you should also test scenarios that will prompt an error to ensure the system handles failures appropriately.
5. Test your webhooks
Especially when processing inbound SMS, it’s important to test whether your webhooks respond with the expected behavior. Use cURL or Postman to simulate inbound SMS messages and test if your webhooks work as intended.
Best practices for sending SMS with Node.js
1. Validate before sending
To avoid excessive errors and delivery failures, it’s a good idea to validate the phone numbers you’re sending SMS messages to. The easiest way to do this? Use a phone number validation library such as libphonenumber-js.
2. Secure sensitive data with environment variables
The last thing you want to do is expose your API keys or any other sensitive information in your code. Use environment variables for any data you want to keep concealed.
3. Implement the required opt out methods
Unlike transactional emails, you must have opt-in consent to send transactional SMS and provide a clear, simple way for recipients to opt out. This will also help you to comply with regulations like GDPR and TCPA. The best way to do this is to provide options such as replying to a message with a keyword (STOP, for example) and using inbound processing to handle the opt-outs. You can learn more about SMS compliance in our guide and our article on how to handle opt-in and opt-out for SMS.
4. Use proper error handling
The way your system handles errors is just as crucial to the user experience as how it handles successes. Make sure to implement failed message retries, error logging, and responses.
5. Monitor performance
Use webhooks to get delivery receipts and track the status of your messages. This can help you to identify potential issues early on. In MailerSend, you can view all SMS activity in the app where you’ll find processed, queued, sent, delivered and failed messages.
Easy SMS sending from your app with Node.js and an API
Sending transactional text messages does more than just improve your app-based communication—it can add functionality and help optimize workflows with the use of inbound routing and webhooks for organizations within the banking and financial services sector, e-commerce, SaaS, and more. We’ve been through a few simple examples in this article, but with the non-blocking architecture and scalability of Node,js, a flexible API, and some experimentation, you’ll find plenty of ways to employ SMS for your Node.js application.
Start sending SMS from you Node.js app with MailerSend
Sign up for free to check out MailerSend's features and get 500 emails/month. Upgrade at any time to a Starter plan to get SMS sending plus 100 SMS/month.