How to send emails with Node.js: Email API or Nodemailer (SMTP)

It can handle multiple email requests concurrently without impacting performance, which makes Node.js a great choice for integrating transactional email delivery into your web applications. It’s an easily scalable solution, even when your application deals with high volumes of email traffic.
In this article, you’ll learn how you can send emails in a Node.js backend with an email API and with SMTP (Simple Mail Transfer Protocol), with code examples, along with the pros and cons of both. Plus, we’ll share some best practices to ensure your Node.js implementation is reliable and secure.
Which should you use: API or Nodemailer (SMTP)?
Choosing between an email API or using Nodemailer with an SMTP server largely depends on which features and functionality you need for your setup, as well as your technical capabilities.
If you’re looking to utilize email templates, analytics, suppressions management, inbound routing and more, you’ll definitely want to go with an email API. If you’d rather configure and manage your own SMTP server (and you have time to do so!) or need a simpler email delivery solution, then Nodemailer might be your best bet.
Here’s a quick overview comparing both.
Feature | Email API | Nodemailer |
Ease of Use | Easy to implement but requires technical knowledge | Easy to implement but requires some technical knowledge. If using own SMTP server, requires considerable configuration. |
Reliability | Very good, third-party services ensure high deliverability and handle retries | Varies, very good if using a third-party service, can be difficult to manage if using own SMTP server setup |
Scalability | Designed to handle large volumes of emails seamlessly | Varies, usually very good if using third-party service, otherwise, it depends on SMTP server capabilities |
Cost | Variable and usage-based | Low to Medium if managing own SMTP server, variable and usage-based if using third-party service |
Features | Advanced features like analytics, templates, and list management | Focuses on sending emails without advanced features |
Security | Built-in support for security protocols like DKIM, SPF, and DMARC | Security depends on SMTP server configuration, usually good if using a third-party service |
Dependency | Relies on third-party service uptime and performance | Relies on third-party service uptime and performance or more control if managing own server |
Customization | Depends on the API provider’s features and limitations | Depends on SMTP service providers feature and limitations. Can provide full control if managing own server |
Setup Complexity | Simple integration with provided SDKs and APIs | Simple integration with SMTP provider’s credentials, self-managed SMTP server require more setup and configuration of SMTP settings |
Community Support | Large community and extensive documentation from API providers | Widely used with extensive documentation and community support |
How to send emails with Node.js
Whether you go with an email API or Nodemailer, you need to be familiar with Node.js and be comfortable with some basic coding. For this tutorial, we’ll use the MailerSend email API and SMTP service, so you’ll also want to get set up with an account.
Here’s how you can quickly do that:
1. Sign up for a MailerSend account. It’s free to join and you’ll get 100 emails and a trial domain to play about with, so you can start setting this up in a few minutes. And the good news is, if you like what you see, you can subscribe to a Free plan and get up to 3,000 emails a month without spending a penny.
2. Once you’ve signed up and verified your email address, you need to create an API token (if you plan on using the email API) or an SMTP user and credentials (if you plan on using Nodemailer and SMTP).
To create an API token:
From the dashboard, click Integrations in the left-hand menu then click Manage next to API tokens.
On the API tokens page click Generate new token and a pop-up will appear to create the token. Enter a recognizable name, choose the domain you want to create the token for, and allow the appropriate access. Then click Create token.
Your API token will be generated. Copy and save or download the token. Once you close this pop-up, you won’t be able to view this token again for security reasons.
To create a new SMTP user and credentials:
From the dashboard, click Domains in the left-hand menu. If you’d like to use your own domain, you can add one by clicking Add domain, or you can use the trial domain. See how to add and verify a domain.
Next to the domain you want to use, click Manage. Scroll down to the SMTP section and click Generate new user. A pop-up will appear, enter a recognizable name for your new SMTP user then click Save user.
You’ll then be given your SMTP credentials, which include a username, password, server address, and port. Click Save user. You can then save the credentials somewhere or access them later by clicking Manage.
Sending emails in Node.js with an email API
The most powerful and feature-rich way to send emails with Node.js involves using an email API. It’s relatively straightforward, and since using one of the packages with SMTP still requires some technical knowledge, it’s worth doing a little extra to get more advanced features and capabilities.
With MailerSend’s API, you’ll get features like personalization, dynamic email templates, suppression list management, analytics, sender authentication using SPF, DKIM and DMARC security protocols, and tons more.
Here’s how to get started.
1. Make sure you have your Node.js environment ready by installing Node.js on your system.
Then, you’ll want to create a new Node.js project by running npm init in your project directory and setting up your package.json file by following the prompts.
2. Next, install the MailerSend package with the following command:
npm install mailersendTo use the env variable in your code, install the Dotenv module:
npm install dotenv --saveWe will use this approach for our API token in the following code examples. To define the variable for your API token, create a .env file in the root directory of your Node.js project named .env and add your MAILERSEND_API_TOKEN variable to it. The file should look like this:
API_KEY=Your_API_Key_HereHow to send an HTML email
Let’s take a look at the code needed to send a simple HTML email with Node.js using the MailerSend API. For this example, we’ll send a trial sign-up confirmation email to confirm the user’s trial subscription and give them any relevant information.
import 'dotenv/config';
import {
	MailerSend,
	EmailParams,
	Sender,
	Recipient
} from "mailersend";

const mailerSend = new MailerSend({
	apiKey: process.env.API_KEY,
});

const sentFrom = new Sender("bob@yourbusiness.com", "Bob");

const recipients = [
	new Recipient("pam@theoffice.com", "Pam")
];

const htmlContent = `
  <p>Hey there!</p>
  <p>Welcome to Your Business, we're happy to have you here!</p>
  <p>You'll be happy to know that your free trial awaits, all you need to do is head to your account, log in and start playing.</p>
  <p>Remember to check out our guides and contact support if you need anything.</p>
  <br>
  <p>Regards,</p>
  <p>The Your Business Team</p>
`;

const emailParams = new EmailParams()
	.setFrom(sentFrom)
	.setTo(recipients)
	.setReplyTo(sentFrom)
	.setSubject("Welcome! Your free trial is ready.")
	.setHtml(htmlContent)
	.setText("Hey there! Welcome to Your Business, we're happy to have you here! You'll be happy to know that your free trial awaits, all you need to do is head to your account, log in and start playing. Remember to check out our guides and contact support if you need anything. Regards, The Your Business Team");

mailerSend.email.send(emailParams)
	.then(response => {
		console.log("Email sent successfully:", response);
	})
	.catch(error => {
		console.error("Error sending email:", error);
	})
If you need to add any CC or BCC recipients, you need to modify the emailParams object to include these recipients. Here’s what the code would look like with added CC and BCC recipients:
import 'dotenv/config';
import {
	MailerSend,
	EmailParams,
	Sender,
	Recipient
} from "mailersend";

const mailerSend = new MailerSend({
	apiKey: process.env.API_KEY,
});

const sentFrom = new Sender("bob@yourbusiness.com", "Bob");

const recipients = [
	new Recipient("pam@theoffice.com", "Pam")
];

const ccRecipients = [
	new Recipient("john@yourbusiness.com", "John")
];

const bccRecipients = [
	new Recipient("sales@yourbusiness.com", "Sales")
];

const htmlContent = `
  <p>Hey there!</p>
  <p>Welcome to Your Business, we're happy to have you here!</p>
  <p>You'll be happy to know that your free trial awaits, all you need to do is head to your account, log in and start playing.</p>
  <p>Remember to check out our guides and contact support if you need anything.</p>
  <br>
  <p>Regards,</p>
  <p>The Your Business Team</p>
`;

const emailParams = new EmailParams()
	.setFrom(sentFrom)
	.setTo(recipients)
	.setCc(ccRecipients) // Adding CC recipients
	.setBcc(bccRecipients) // Adding BCC recipients
	.setReplyTo(sentFrom)
	.setSubject("Welcome! Your free trial is ready.")
	.setHtml(htmlContent)
	.setText("Hey there! Welcome to Your Business, we're happy to have you here! You'll be happy to know that your free trial awaits, all you need to do is head to your account, log in and start playing. Remember to check out our guides and contact support if you need anything. Regards, The Your Business Team");

mailerSend.email.send(emailParams)
	.then(response => {
		console.log("Email sent successfully:", response);
	})
	.catch(error => {
		console.error("Error sending email:", error);
	})
How to send a template-based email
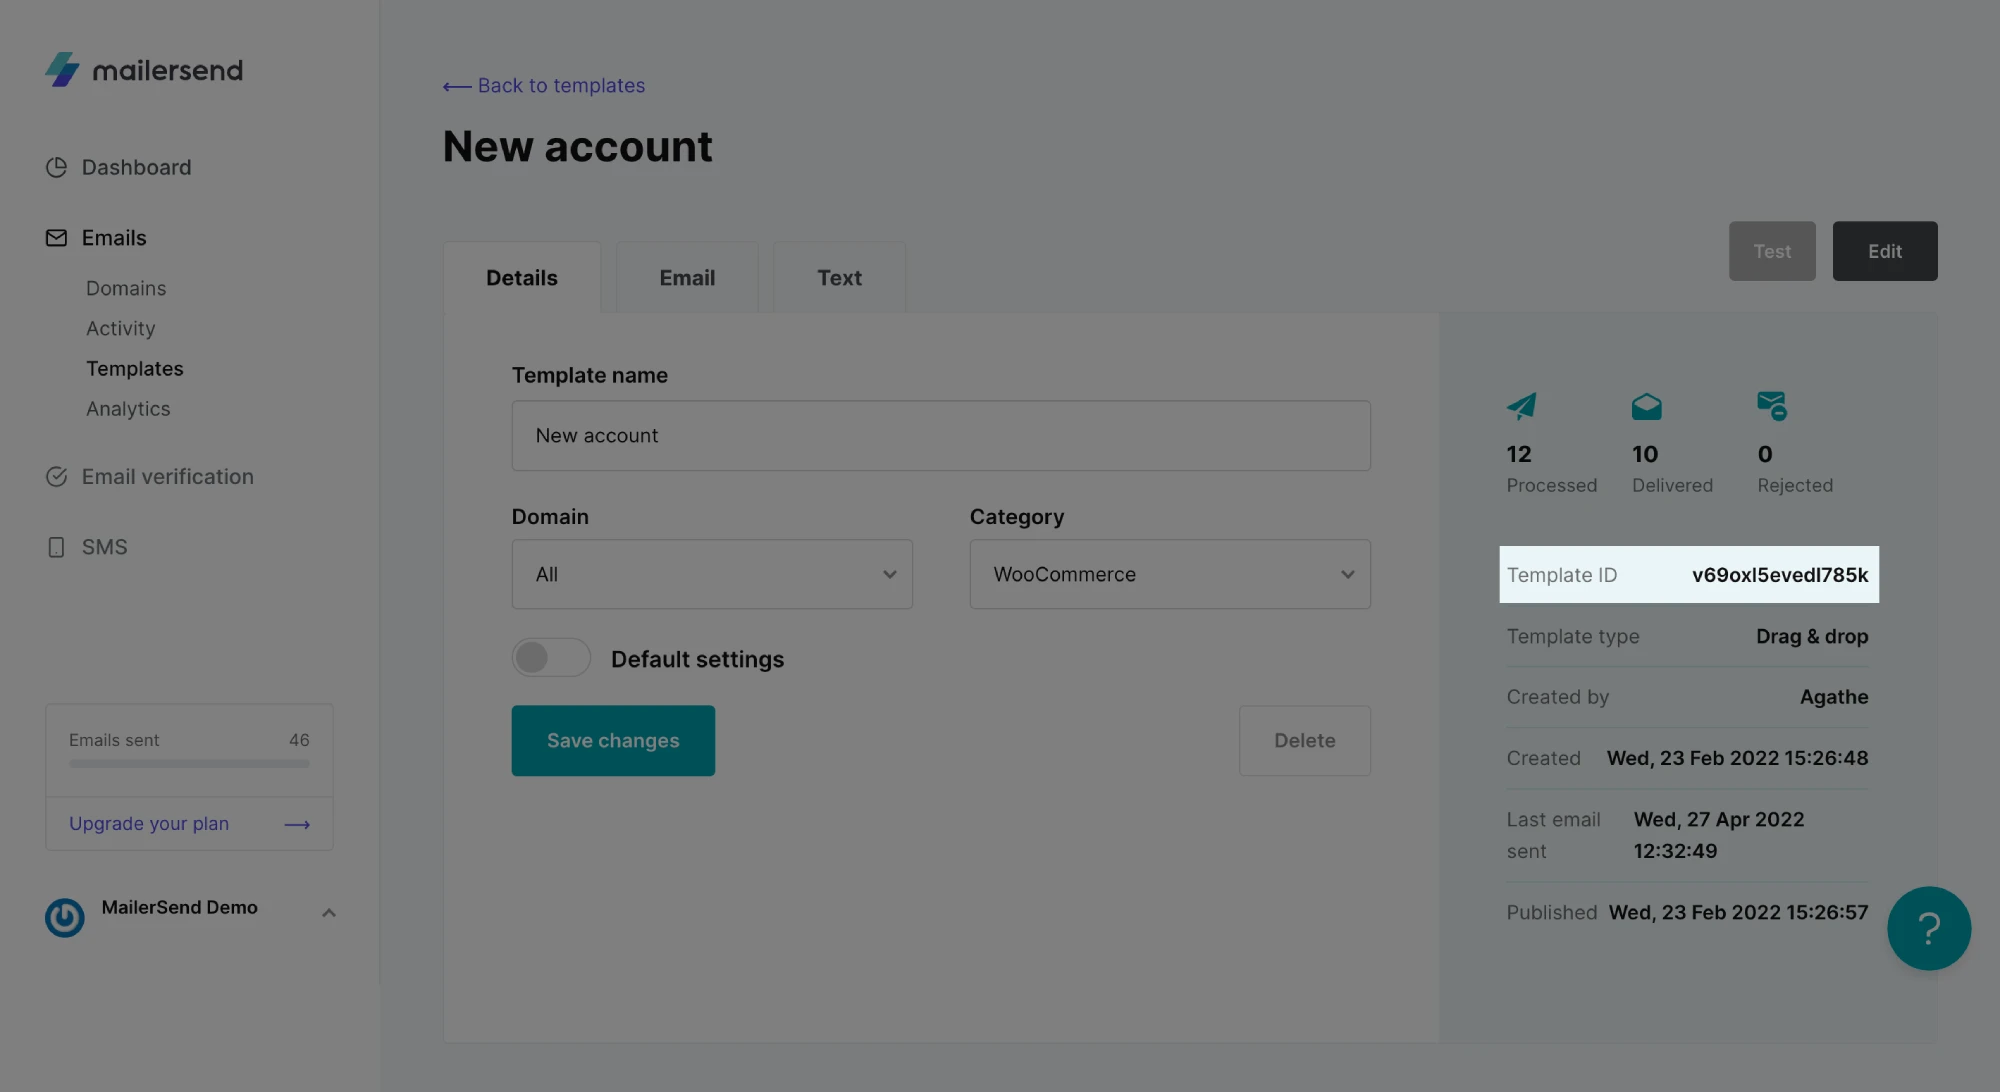
One of the biggest benefits of using an email API is the ability to send professionally designed email templates. In MailerSend this is made super easy with the template builders—you can create templates with the drag and drop or rich-text editors or build them from scratch with the HTML editor. Then, all you need to do is get the template ID and add it to your code.
Here’s how the code for our free trial email will look when we use a template:
import 'dotenv/config';
import {
	MailerSend,
	EmailParams,
	Sender,
	Recipient
} from "mailersend";

const mailerSend = new MailerSend({
	apiKey: process.env.API_KEY,
});

const sentFrom = new Sender("bob@yourbusiness.com", "Bob");

const recipients = [
	new Recipient("pam@theoffice.com", "Pam")
];

const emailParams = new EmailParams()
	.setFrom(sentFrom)
	.setTo(recipients)
	.setReplyTo(sentFrom)
	.setSubject("Welcome! Your free trial is ready.")
	.setTemplateId('templateId');

mailerSend.email.send(emailParams)
	.then(response => {
		console.log("Email sent successfully:", response);
	})
	.catch(error => {
		console.error("Error sending email:", error);
	})
How to send emails with personalization
Personalization variables let you personalize a single email for multiple recipients by importing data such as the recipient’s name. To do this, you need to define the variables and then add them to your email content. In MailerSend, variables are formatted as {{var}}.
Here’s what the code would look like. In this example, we’re sending an email to let the user know their trial is about to expire.
import 'dotenv/config';
import {
	MailerSend,
	EmailParams,
	Sender,
	Recipient
} from "mailersend";

const mailerSend = new MailerSend({
	apiKey: process.env.API_KEY,
});

const sentFrom = new Sender("bob@youbusiness.com", "Bob");

const recipients = [
	new Recipient("pam@theoffice.com", "Pam")
];

const personalization = [{
	email: "pam@theoffice.com",
	data: {
		name: 'Pam'
	},
}];

const htmlContent = `
<p>Hi {{name}}.</p>
<p>We wanted to remind you that your free trial will expire in 3 days.</p>
<p>If you like what you see and would like to continue using Your Business, you can purchase a Premium plan by clicking Upgrade in your dashboard.</p>
<p>If you choose not to upgrade, you’ll lose access to premium features and your data, which will be permanently deleted after 30 days.</p>
<br>
<p>Regards,</p>
<p>The Your Business Team</p> `;

const emailParams = new EmailParams()
	.setFrom(sentFrom)
	.setTo(recipients)
	.setReplyTo(sentFrom)
	.setPersonalization(personalization)
	.setSubject("{{name}}, your free trial is about to expire.")
	.setHtml(htmlContent)
	.setText("Hi {{name}}. We wanted to remind you that your free trial will expire in 3 days. If you like what you see and would like to continue using Your Business, you can purchase a Premium plan by clicking Upgrade in your dashboard. If you choose not to upgrade, you’ll lose access to premium features and your data, which will be permanently deleted after 30 days. Regards, The Your Business Team");

mailerSend.email.send(emailParams)
	.then(response => {
		console.log("Email sent successfully:", response);
	})
	.catch(error => {
		console.error("Error sending email:", error);
})How to send an email with an attachment
Guess what? Pam decided to purchase a subscription and now it’s time to send her first invoice. We do this by using the attachment class and defining the attachment with the content, filename, and type properties.
import 'dotenv/config';
import {
	MailerSend,
	EmailParams,
	Sender,
	Recipient
} from "mailersend";

const mailerSend = new MailerSend({
	apiKey: process.env.API_KEY,
});

const sentFrom = new Sender("bob@youbusiness.com", "Bob");

const recipients = [
	new Recipient("pam@theoffice.com", "Pam")
];

const attachmentContent = fs.readFileSync('/path/to/invoice.pdf', {
	encoding: 'base64'
});
const attachment = new Attachment({
content: attachmentContent,
filename: 'invoice.pdf',
type: 'application/pdf',
disposition: 'attachment' // Optional: Specifies that it's an attachment
});

]

const personalization = [{
	email: "pam@theoffice.com",
	data: {
		name: 'Pam'
	},
}];

const htmlContent = `
<p>Hi {{name}}.</p>
<p>Thanks for using Your Business!</p>
<p>Your subscription has been renewed for 1 month. The details of your invoice are below and a downloadable copy has been attached</p>
<br>
<p>Regards,</p>
<p>The Your Business Team</p> `;

const emailParams = new EmailParams()
	.setFrom(sentFrom)
	.setTo(recipients)
	.setReplyTo(sentFrom)
	.setPersonalization(personalization)
	.setSubject("{{name}}, here’s your Your Business invoice.")
	.setHtml(htmlContent)
	.setText("Hi {{name}}. Thanks for using Your Business! Your subscription has been renewed for 1 month. The details of your invoice are below and a downloadable copy has been attached Regards, The Your Business Team");

// Assign the attachment to emailParams
emailParams.attachments = [attachment];

mailerSend.email.send(emailParams)
	.then(response => {
		console.log("Email sent successfully:", response);
	})
	.catch(error => {
		console.error("Error sending email:", error);
	})
How to send emails in bulk
MailerSend’s bulk email endpoint makes it easy to send personalized emails in bulk using a single API call. It allows you to bypass rate limiting and make your sendings more efficient.
For this example, we’ll send Pam and Dwight a feedback request. This type of transactional email is perfectly suited to bulk email sending, as it’s not time-sensitive and can be sent at any time.
import 'dotenv/config';
import {
	MailerSend,
	EmailParams,
	Sender,
	Recipient
} from "mailersend";

const mailerSend = new MailerSend({
	apiKey: process.env.API_KEY,
});

const sentFrom = new Sender("bob@yourbusiness.com", "Bob");

const bulkEmails = [];

const personalization = [{
		email: "pam@theoffice.com",
		data: {
			name: 'Pam'
		},
	},
	{
		email: "dwight@theoffice.com",
		data: {
			name: 'Dwight'
		},
	}
];

const htmlContent = `
<p>Hi {{name}}.</p>
<p>Thanks for using Your Business!</p>
<p>As you’ve been using the app for a while now, we’d love to hear your thoughts.</p>
<p>Our customer feedback survey takes just a few minutes to complete and will help us to make our offering even better.</p>
<p><a href="url to your survey" target="_blank">Take survey</a></p>
<p>Thanks for your participation!</p>
<br>
<p>Regards,</p>
<p>The Your Business Team</p>`;

const textContent = `
Hi {{name}}.

Thanks for using Your Business!

As you’ve been using the app for a while now, we’d love to hear your thoughts.

Our customer feedback survey takes just a few minutes to complete and will help us to make our offering even better.

Take survey: url to your survey

Thanks for your participation!

Regards,
The Your Business Team`;

const emailParams1 = new EmailParams()
	.setFrom(sentFrom)
	.setTo([new Recipient("pam@theoffice.com", "Pam")])
	.setSubject("Let us know what you think.")
	.setHtml(htmlContent)
	.setText(textContent)
	.setPersonalization([personalization[0]]);

bulkEmails.push(emailParams1);

const emailParams2 = new EmailParams()
	.setFrom(sentFrom)
	.setTo([new Recipient("dwight@theoffice.com", "Dwight")])
	.setSubject("Let us know what you think.")
	.setHtml(htmlContent)
	.setText(textContent)
	.setPersonalization([personalization[1]]);

bulkEmails.push(emailParams2);

mailerSend.email.send(emailParams)
	.then(response => {
		console.log("Email sent successfully:", response);
	})
	.catch(error => {
		console.error("Error sending email:", error);
	})
How to schedule an email
If you need to send an email at a specific time or date, you can use the .setSendAt parameter and a Unix timestamp to schedule it. Here’s an example of the code for a maintenance notification email we’re sending to Pam and Dwight.
import 'dotenv/config';
import {
	MailerSend,
	EmailParams,
	Sender,
	Recipient
} from "mailersend";

const mailerSend = new MailerSend({
	apiKey: process.env.API_KEY,
});

const sentFrom = new Sender("bob@yourbusiness.com", "Bob");

const recipients = [
	new Recipient("pam@theoffice.com", "Pam"),
	new Recipient("Dwight@theoffice.com", "Dwight")
];

const htmlContent = `
<p>We would like to inform you that the Your Business app is scheduled for maintenance on Tuesday, 25th June 2024 at 3 AM.</p>
<p>This will result in some downtime between the hours of 3 AM and 3:30 AM, after which services will resume as usual.</p>
<p>If you have any questions, please contact support.</p>
<br>
<p>Regards,</p>
<p>The Your Business Team</p>`;

const textContent = `
We would like to inform you that the Your Business app is scheduled for maintenance on Tuesday, 25th June 2024 at 3 AM.

This will result in some downtime between the hours of 3 AM and 3:30 AM, after which services will resume as usual.

If you have any questions, please contact support.

Regards,
The Your Business Team

const emailParams = new EmailParams()
  .setFrom(sentFrom)
  .setTo(recipients)
  .setReplyTo(sentFrom)
  .setSubject("Notice of scheduled maintenance on Tuesday, 25th June")
  .setHtml(htmlContent)
  .setText(textContent)
  .setSendAt(Math.floor((new Date(Date.now()+ 30*60*1000)).getTime() / 1000)); //send in 30mins NB:param has to be a Unix timestamp e.g 2443651141

mailerSend.email.send(emailParams)
	.then(response => {
		console.log("Email sent successfully:", response);
	})
	.catch(error => {
		console.error("Error sending email:", error);
	})
In this example, the Date.now() method returns the current time in milliseconds. Then, adding 30 60 1000 calculates the time 30 minutes from the current time.
The getTime() method of the Date object returns the number of milliseconds since the Unix Epoch. Dividing this by 1000 converts milliseconds to seconds to comply with Unix timestamps which are in seconds.
Math.floor() rounds down the timestamp to the nearest whole number, as Unix timestamps are integers. Then, the setSendAt method of EmailParams is then used to set the scheduled send time with the calculated Unix timestamp.
Sending emails in Node.js with SMTP and Nodemailer
If you want to use SMTP, Nodemailer is an excellent solution. The Node.js module lets you integrate email-sending into your Node.js applications in a simple and efficient way while supporting authentication mechanisms to make the connection to SMTP servers secure.
In a nutshell:
It simplifies email integration for your Node.js apps
You can send attachments and HTML content
It’s a simple and secure way to send emails with Node.js and SMTP
So let’s dive right in.
1. First, make sure you have your Node.js environment ready by installing Node.js on your system.
Then create a new Node.js project by running npm init in your project directory and setting up your package.json file by following the prompts.
2. Install the Nodemailer module:
npm install nodemailer3. Create an .env file in your project root directory for your MailerSend SMTP credentials—if you need a refresher on how to create an SMTP user and retrieve your credentials, jump back to the beginning of this section or read our guide how to send emails using SMTP.
You’ll need to add your SMTP server address, port, username, and password:
SMTP_HOST=smtp.mailersend.net
SMTP_PORT=587
SMTP_USER=your_mailersend_username
SMTP_PASS=your_mailersend_password
4. Install the dotenv package to load your SMTP credentials from the .env file:
npm install dotenv5. Send an email! Here’s an example of the code using our trial confirmation email:
import 'dotenv/config';
import nodemailer from 'nodemailer';

// Load environment variables from .env file
import dotenv from 'dotenv';
dotenv.config();

// Create a transporter object using SMTP transport
const transporter = nodemailer.createTransport({
	host: process.env.SMTP_HOST,
	port: process.env.SMTP_PORT,
	secure: false, // true for 465, false for other ports
	auth: {
		user: process.env.SMTP_USER,
		pass: process.env.SMTP_PASS,
	},
});

// Setup email data
const mailOptions = {
	from: '"Bob" <bob@yourbusiness.com>', // sender address
	to: 'pam@theoffice.com', // list of receivers
	subject: 'Welcome! Your free trial is ready.', // Subject line
	text: 'Hey there! Welcome to Your Business, we\'re happy to have you here! You\'ll be happy to know that your free trial awaits, all you need to do is head to your account, log in and start playing. Remember to check out our guides and contact support if you need anything. Regards, The Your Business Team', // plain text body
	html: `
    <p>Hey there!</p>
    <p>Welcome to Your Business, we're happy to have you here!</p>
    <p>You'll be happy to know that your free trial awaits, all you need to do is head to your account, log in and start playing.</p>
    <p>Remember to check out our guides and contact support if you need anything.</p>
    <br>
    <p>Regards,</p>
    <p>The Your Business Team</p>
  `, // html body
};

// Send email
transporter.sendMail(mailOptions, (error, info) => {
	if (error) {
		return console.log(error);
	}
	console.log('Message sent: %s', info.messageId);
});
And that’s it!
If you want to add an attachment to your email, you simply need to include an attachments array in mailOptions:
attachments: [
  {
    filename: 'invoice.pdf',
    path: '/path/to/invoice.pdf',
  },
]
It’s also possible to include personalization in your emails by modifying the email content and defining the personalization data of your recipients. Here’s that feedback request again with the personalization variable set for our recipients’ names:
import 'dotenv/config';
import nodemailer from 'nodemailer';
import dotenv from 'dotenv';

dotenv.config();

// Create a transporter object using SMTP transport
const transporter = nodemailer.createTransport({
	host: process.env.SMTP_HOST,
	port: process.env.SMTP_PORT,
	secure: false, // true for 465, false for other ports
	auth: {
		user: process.env.SMTP_USER,
		pass: process.env.SMTP_PASS,
	},
});

// Define your list of recipients and their personalization data
const recipients = [{
		email: 'pam@theoffice.com',
		name: 'Pam',
	},
	{
		email: 'dwight@theoffice.com',
		name: 'Dwight',
	},
];

const sendPersonalizedEmails = async (recipients) => {
	for (const recipient of recipients) {
		// Personalize the email content
		const textContent = `Hi ${recipient.name},\nThanks for using Your Business! As you’ve been using the app for a while now, we’d love to hear your thoughts. Our customer feedback survey takes just a few minutes to complete and will help us to make our offering even better. Take survey: url to your survey\nThanks for your participation!\nRegards,\nThe Your Business Team`;

		const htmlContent = `
      <p>Hi ${recipient.name}.</p>
      <p>Thanks for using Your Business!</p>
      <p>As you’ve been using the app for a while now, we’d love to hear your thoughts.</p>
      <p>Our customer feedback survey takes just a few minutes to complete and will help us to make our offering even better.</p>
      <p><a href="url to your survey" target="_blank">Take survey</a></p>
      <p>Thanks for your participation!</p>
      <br>
      <p>Regards,</p>
      <p>The Your Business Team</p>
    `;

		const mailOptions = {
			from: '"Bob" <bob@yourbusiness.com>', // sender address
			to: recipient.email, // recipient address
			subject: 'Let us know what you think.', // Subject line
			text: textContent, // plain text body
			html: htmlContent, // html body
		};

		// Send the email
		try {
			let info = await transporter.sendMail(mailOptions);
			console.log('Message sent: %s', info.messageId);
		} catch (error) {
			console.error('Error sending email:', error);
		}
	}
};

sendPersonalizedEmails(recipients);
Best practices for sending emails in Node.js
When done correctly, and with sending best practices in mind, Node.js makes for an incredibly efficient, reliable, and secure way to send emails. If you’re ready to get started, keep these best practices in mind to ensure a smooth implementation and email-sending experience.
1. Choose the right sending method
While we are fans of our email API due to its flexibility and advanced features, we know that it’s not for everyone. SMTP and email API both have their own advantages when it comes to ease of use, functionality, reliability, and security. If you’re looking for a pared-down, cost-effective solution, SMTP is probably the method for you. For more features, advanced workflows, and tracking API is your best bet.
What’s more, managing your own SMTP server is a lot more complex and requires you to implement your own security measures to keep your sending safe. Going with a third-party provider like MailerSend means you have deliverability, security, and everything else taken care of.
2. Use environment variables
To integrate email sending, you’re going to need to use sensitive data such as API keys and SMTP credentials—and we don’t want these to be exposed to the outside world! By putting them in .env variables, you can conceal them from your code and prevent exposure. It also makes it easier to manage your email, and anything that makes processes more efficient is a win. Instead of updating hardcoded API keys or SMTP credentials in all of your emails, you can simply update the data in the relevant .env file.
3. Implement sufficient error handling
Preparing for failures is a crucial part of any good system. When it comes to email, you want to ensure that you app can handle any errors without crashing or responding in an unexpected way. You can do this by using try-catch blocks or promise error handling to catch and log any errors. This will improve your app’s reliability and make troubleshooting much easier too.
4. Use rate limiting
Rate limiting involves using packages like Bottleneck to limit email sending. Here’s an example:
import Bottleneck from 'bottleneck';

const limiter = new Bottleneck({
	minTime: 100 / maxEmailsPerSecond,
});

limiter.schedule(() => transporter.sendMail(mailOptions));
Doing so will prevent your app from overwhelming your email server and avoid any rate limits set by your email service provider.
5. Validate email addresses
Validating email addresses in real-time will keep your recipient list healthier for longer and help you to maintain good email deliverability. You can validate emails with JavaScript using regular expressions but this will only check that the format of an email address is correct. For checks against non-existent mailboxes, typos, disposable emails, and more you can use an email verification service.
6. Use templates
Email templates allow you to send professionally designed emails that fits your brand. But they also make it easier to manage email content, and help you to keep your code clean and as simple as possible. All you need to do is build your templates, store them separately, and then load them into your emails.
With MailerSend this is really easy. There are 3 email builders you can use—drag and drop, rich-text, and HTML—and once you’ve built your template, all you need to do is retrieve the template ID and add it to your code.
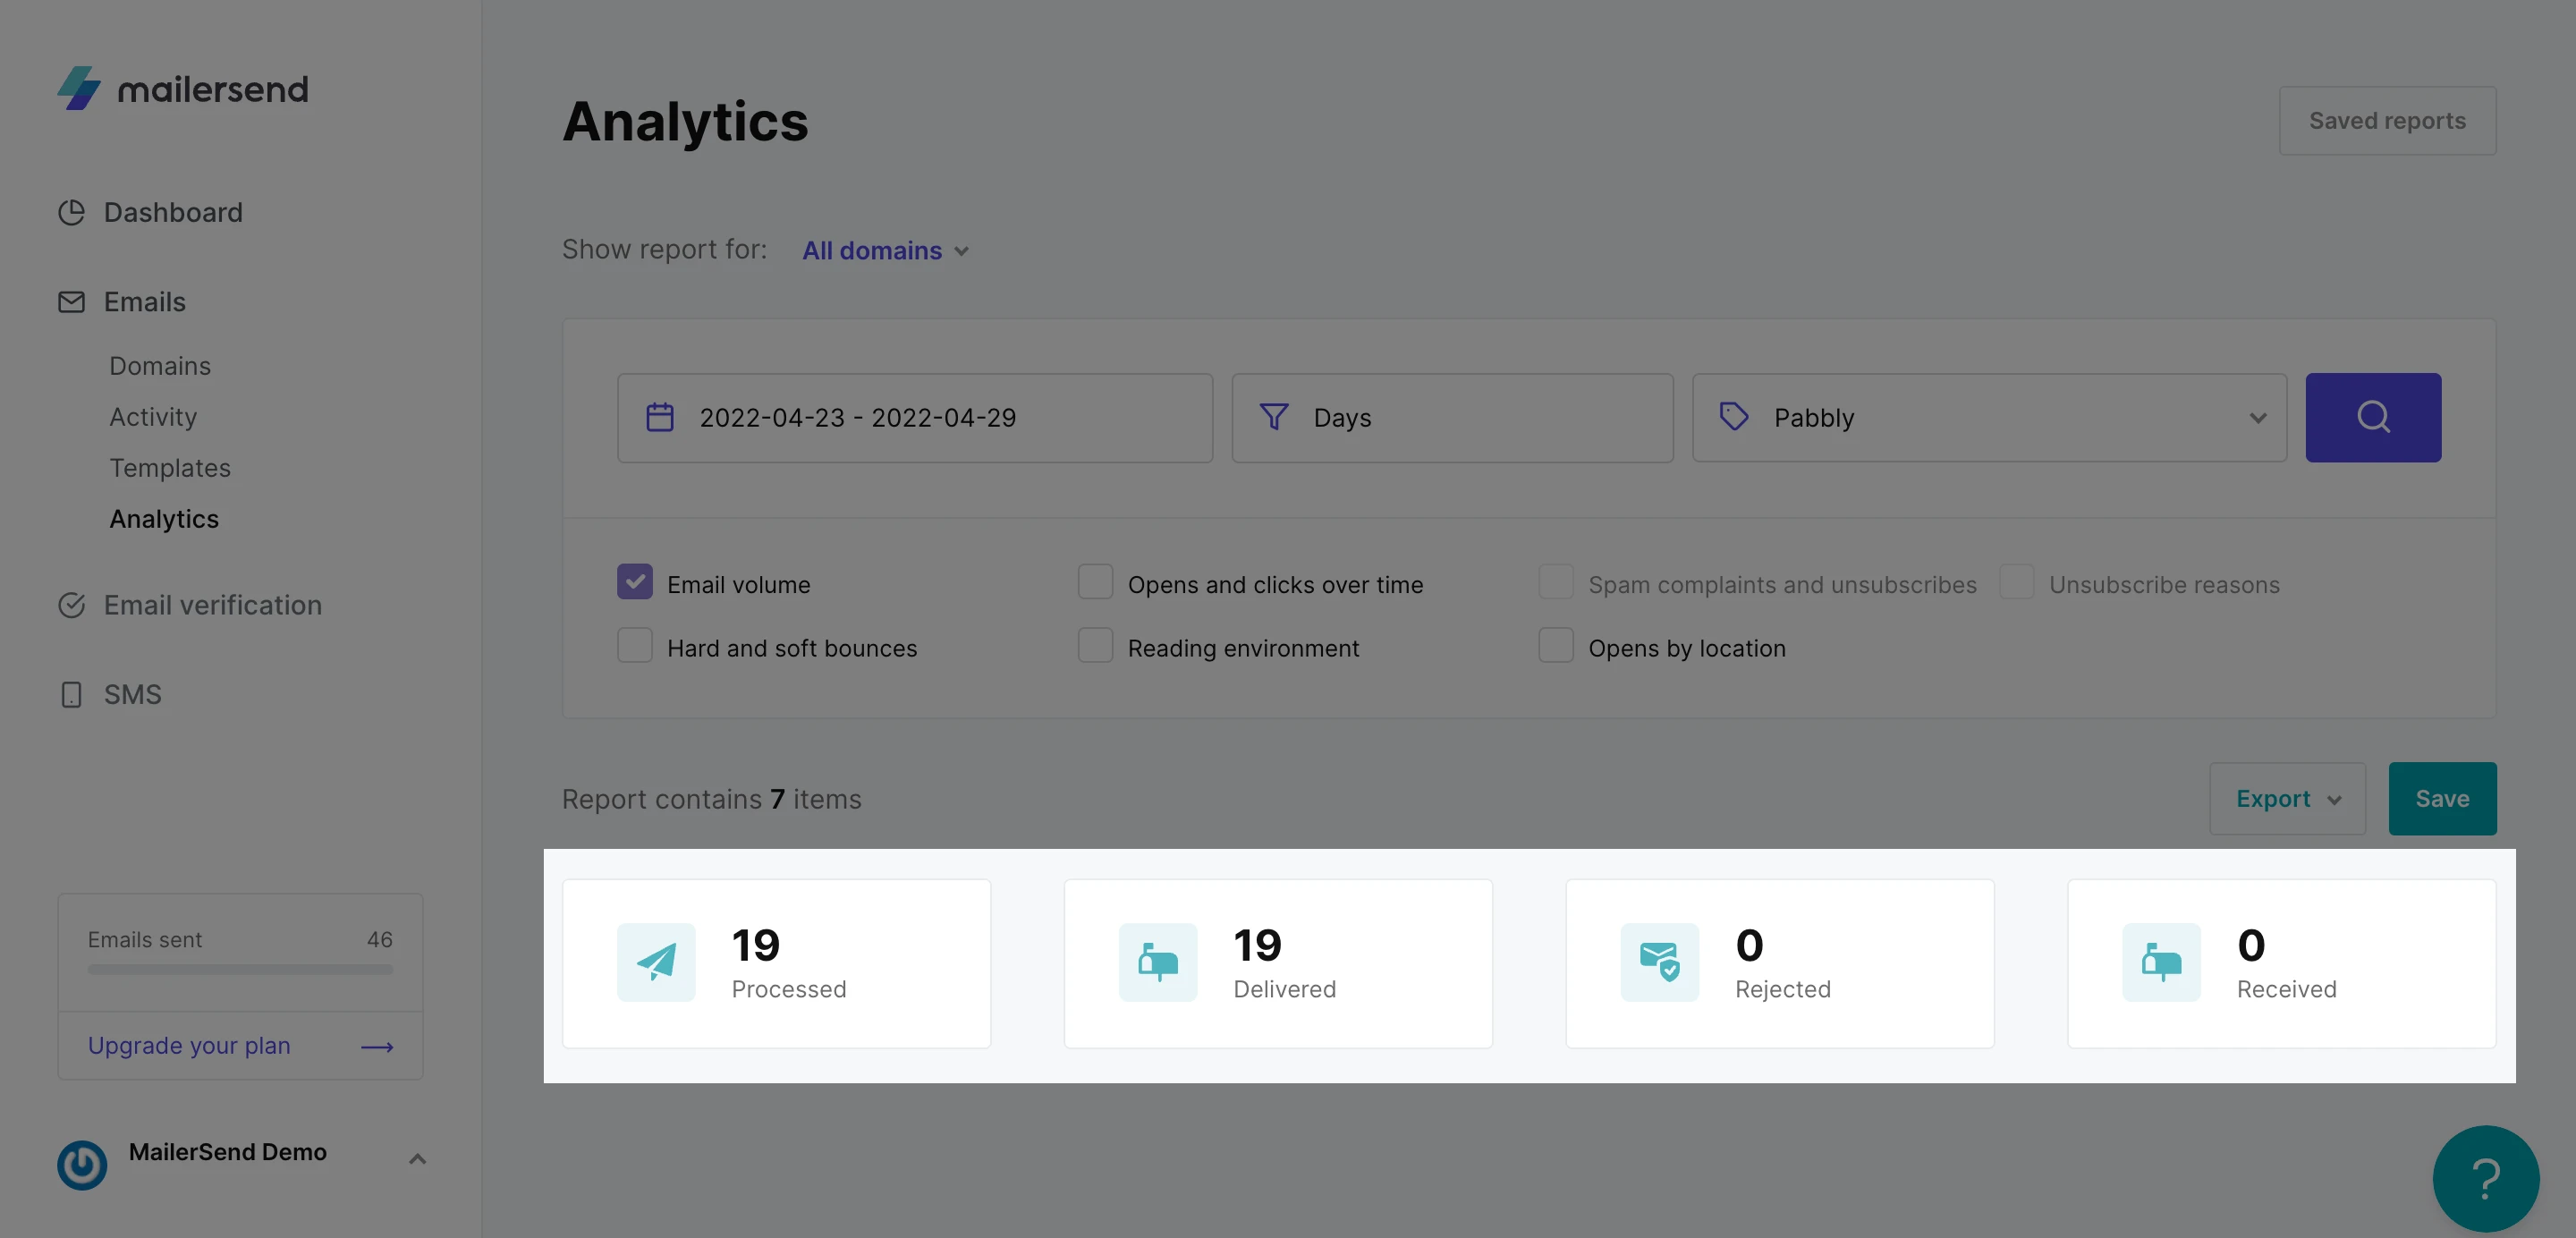
7. Monitor email deliverability and performance
You might think that email analytics are only for the business heads interested in seeing how many conversions an email has. But actually, analytics can provide important performance insights that can help you spot deliverability issues.
What’s more, with MailerSend, you can use webhooks to easily set up notifications so that if anything fishy does happen, you’ll learn in real time instead of having to check the analytics dashboard.
Simple, reliable, and efficient email sending
Using an email API or Nodemailer is the most common method for sending emails with Node.js—and with good reason. Combined with a reliable email service provider, you can’t go wrong, and being a JavaScript runtime, it’s the easiest way to integrate email sending into your JavaScript applications.
If you’re looking for a powerful and secure email API with excellent deliverability, give MailerSend a try.
Sign up for free
Test out MailerSend with a free trial domain—no credit card required. Subscribe to a free plan at any time and get 3,000 emails per month free.